Quick Start
Get started with Sellestial and deploy your first automation in just a few minutes.
-
Connect HubSpot
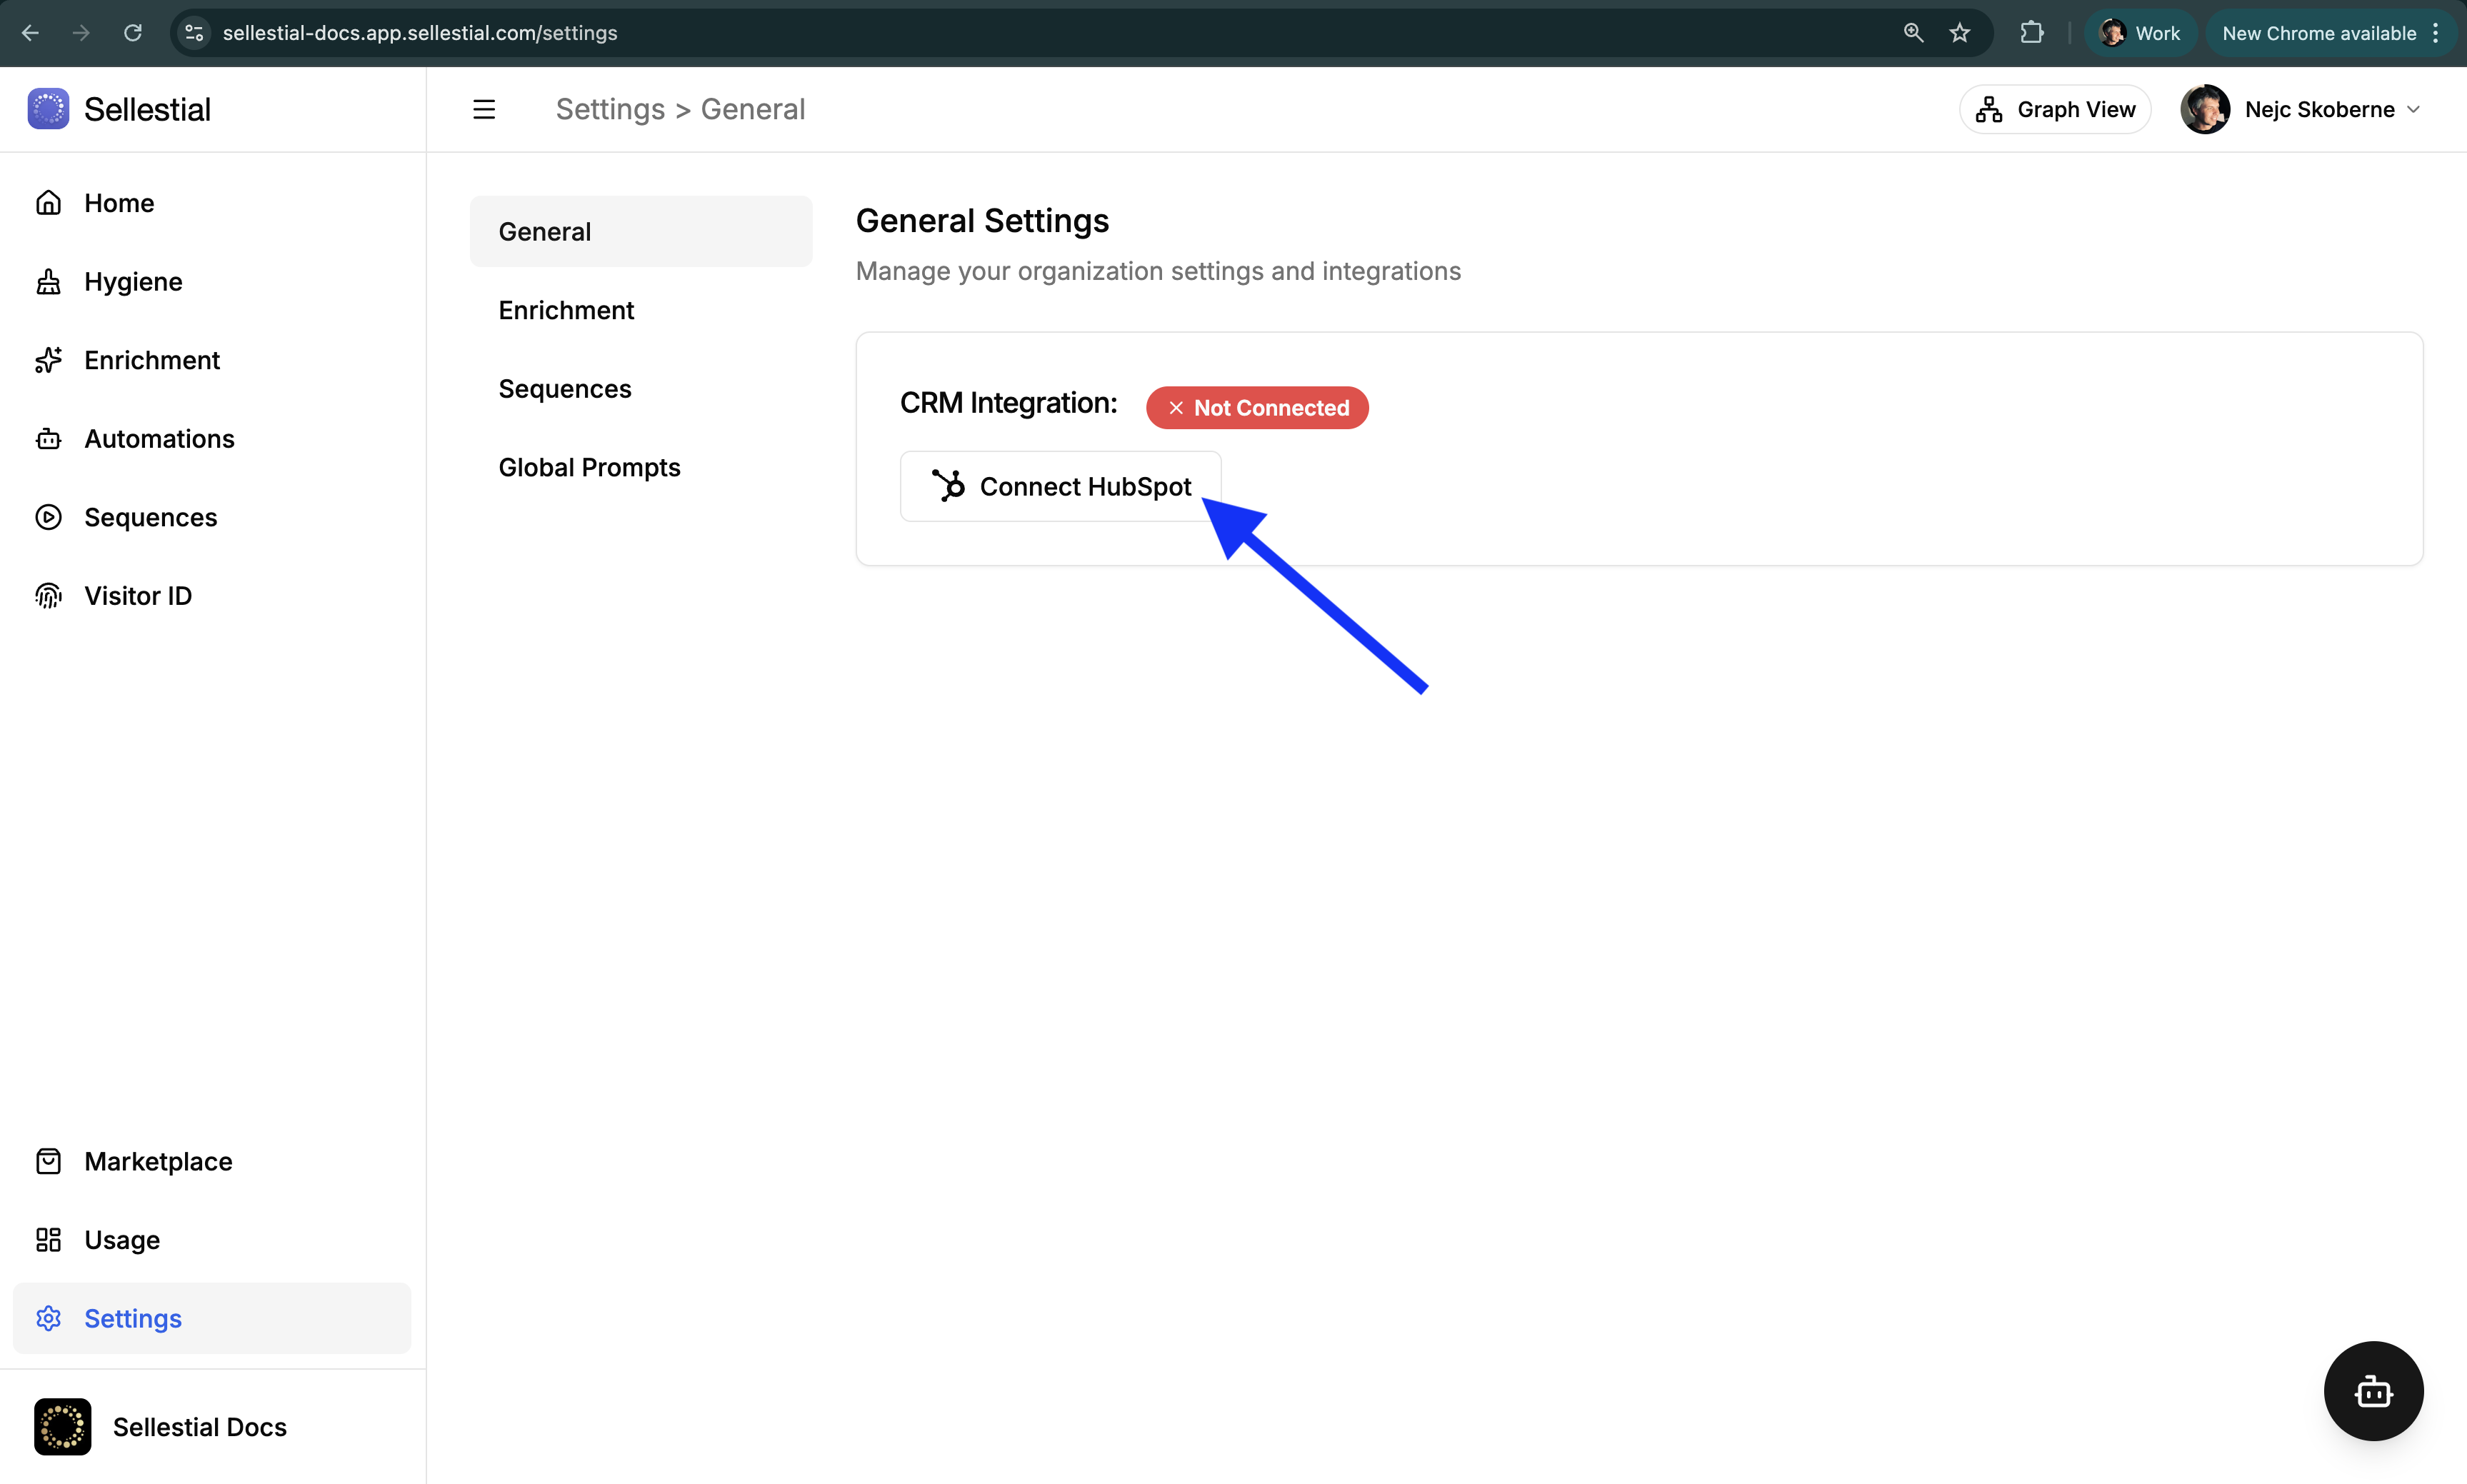
Navigate to Settings → General and click Connect HubSpot. You’ll be redirected to HubSpot to authorize Sellestial.
What Sellestial needs access to- CRM Objects — Read/write contacts, companies, deals, leads, and other objects for data operations
- Properties & Schemas — Read/write custom properties to store enriched data and pipeline results
- Lists — Read lists to use as pipeline input sources
- Automation & Sequences — Create sequences and manage enrollments for outreach campaigns
- Files — Access for document processing and attachments
- Users & Teams — Read user and team info for proper assignment and routing
- Email — Read sales emails for context in sequences and enrichment
All permissions are used exclusively for the automations you configure. Sellestial never modifies data without your explicit pipeline setup.
-
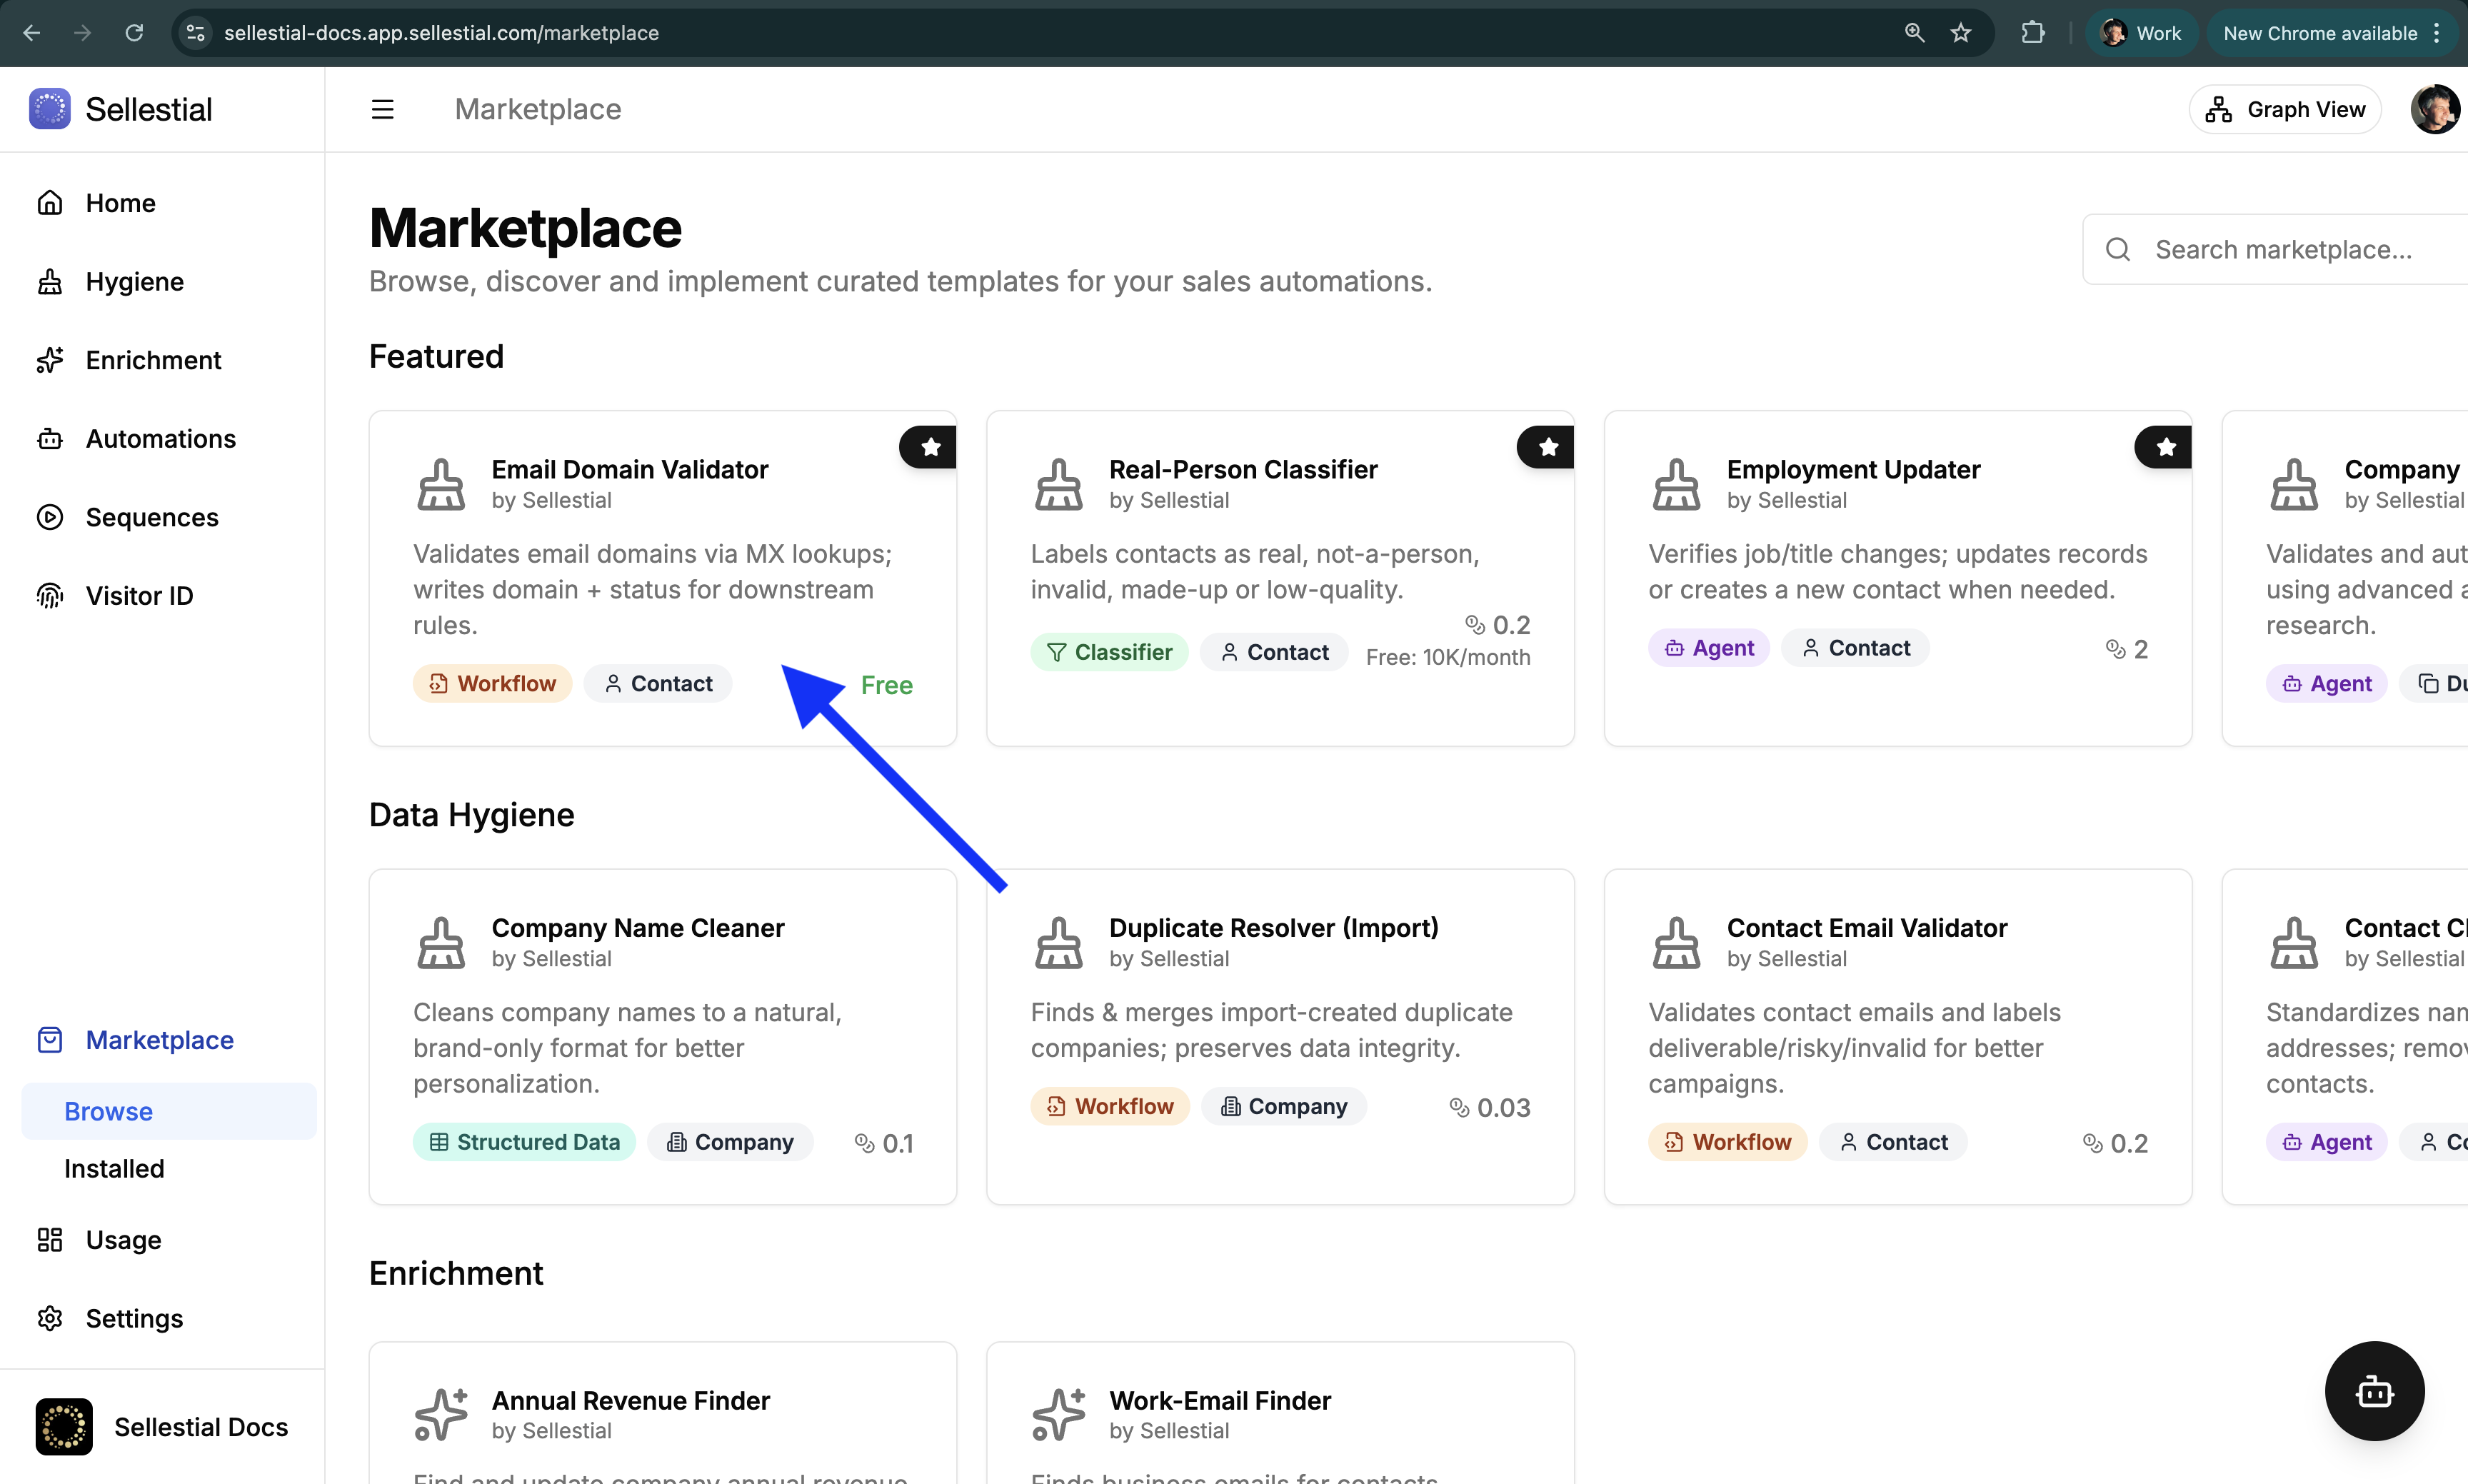
Browse the Template Marketplace
Go to Marketplace in the sidebar and explore pre-built pipeline templates. For your first pipeline, we recommend starting with free validation templates from the Marketplace.
-
Install a Pipeline Template
Click on a template to view details, then click Use Template.
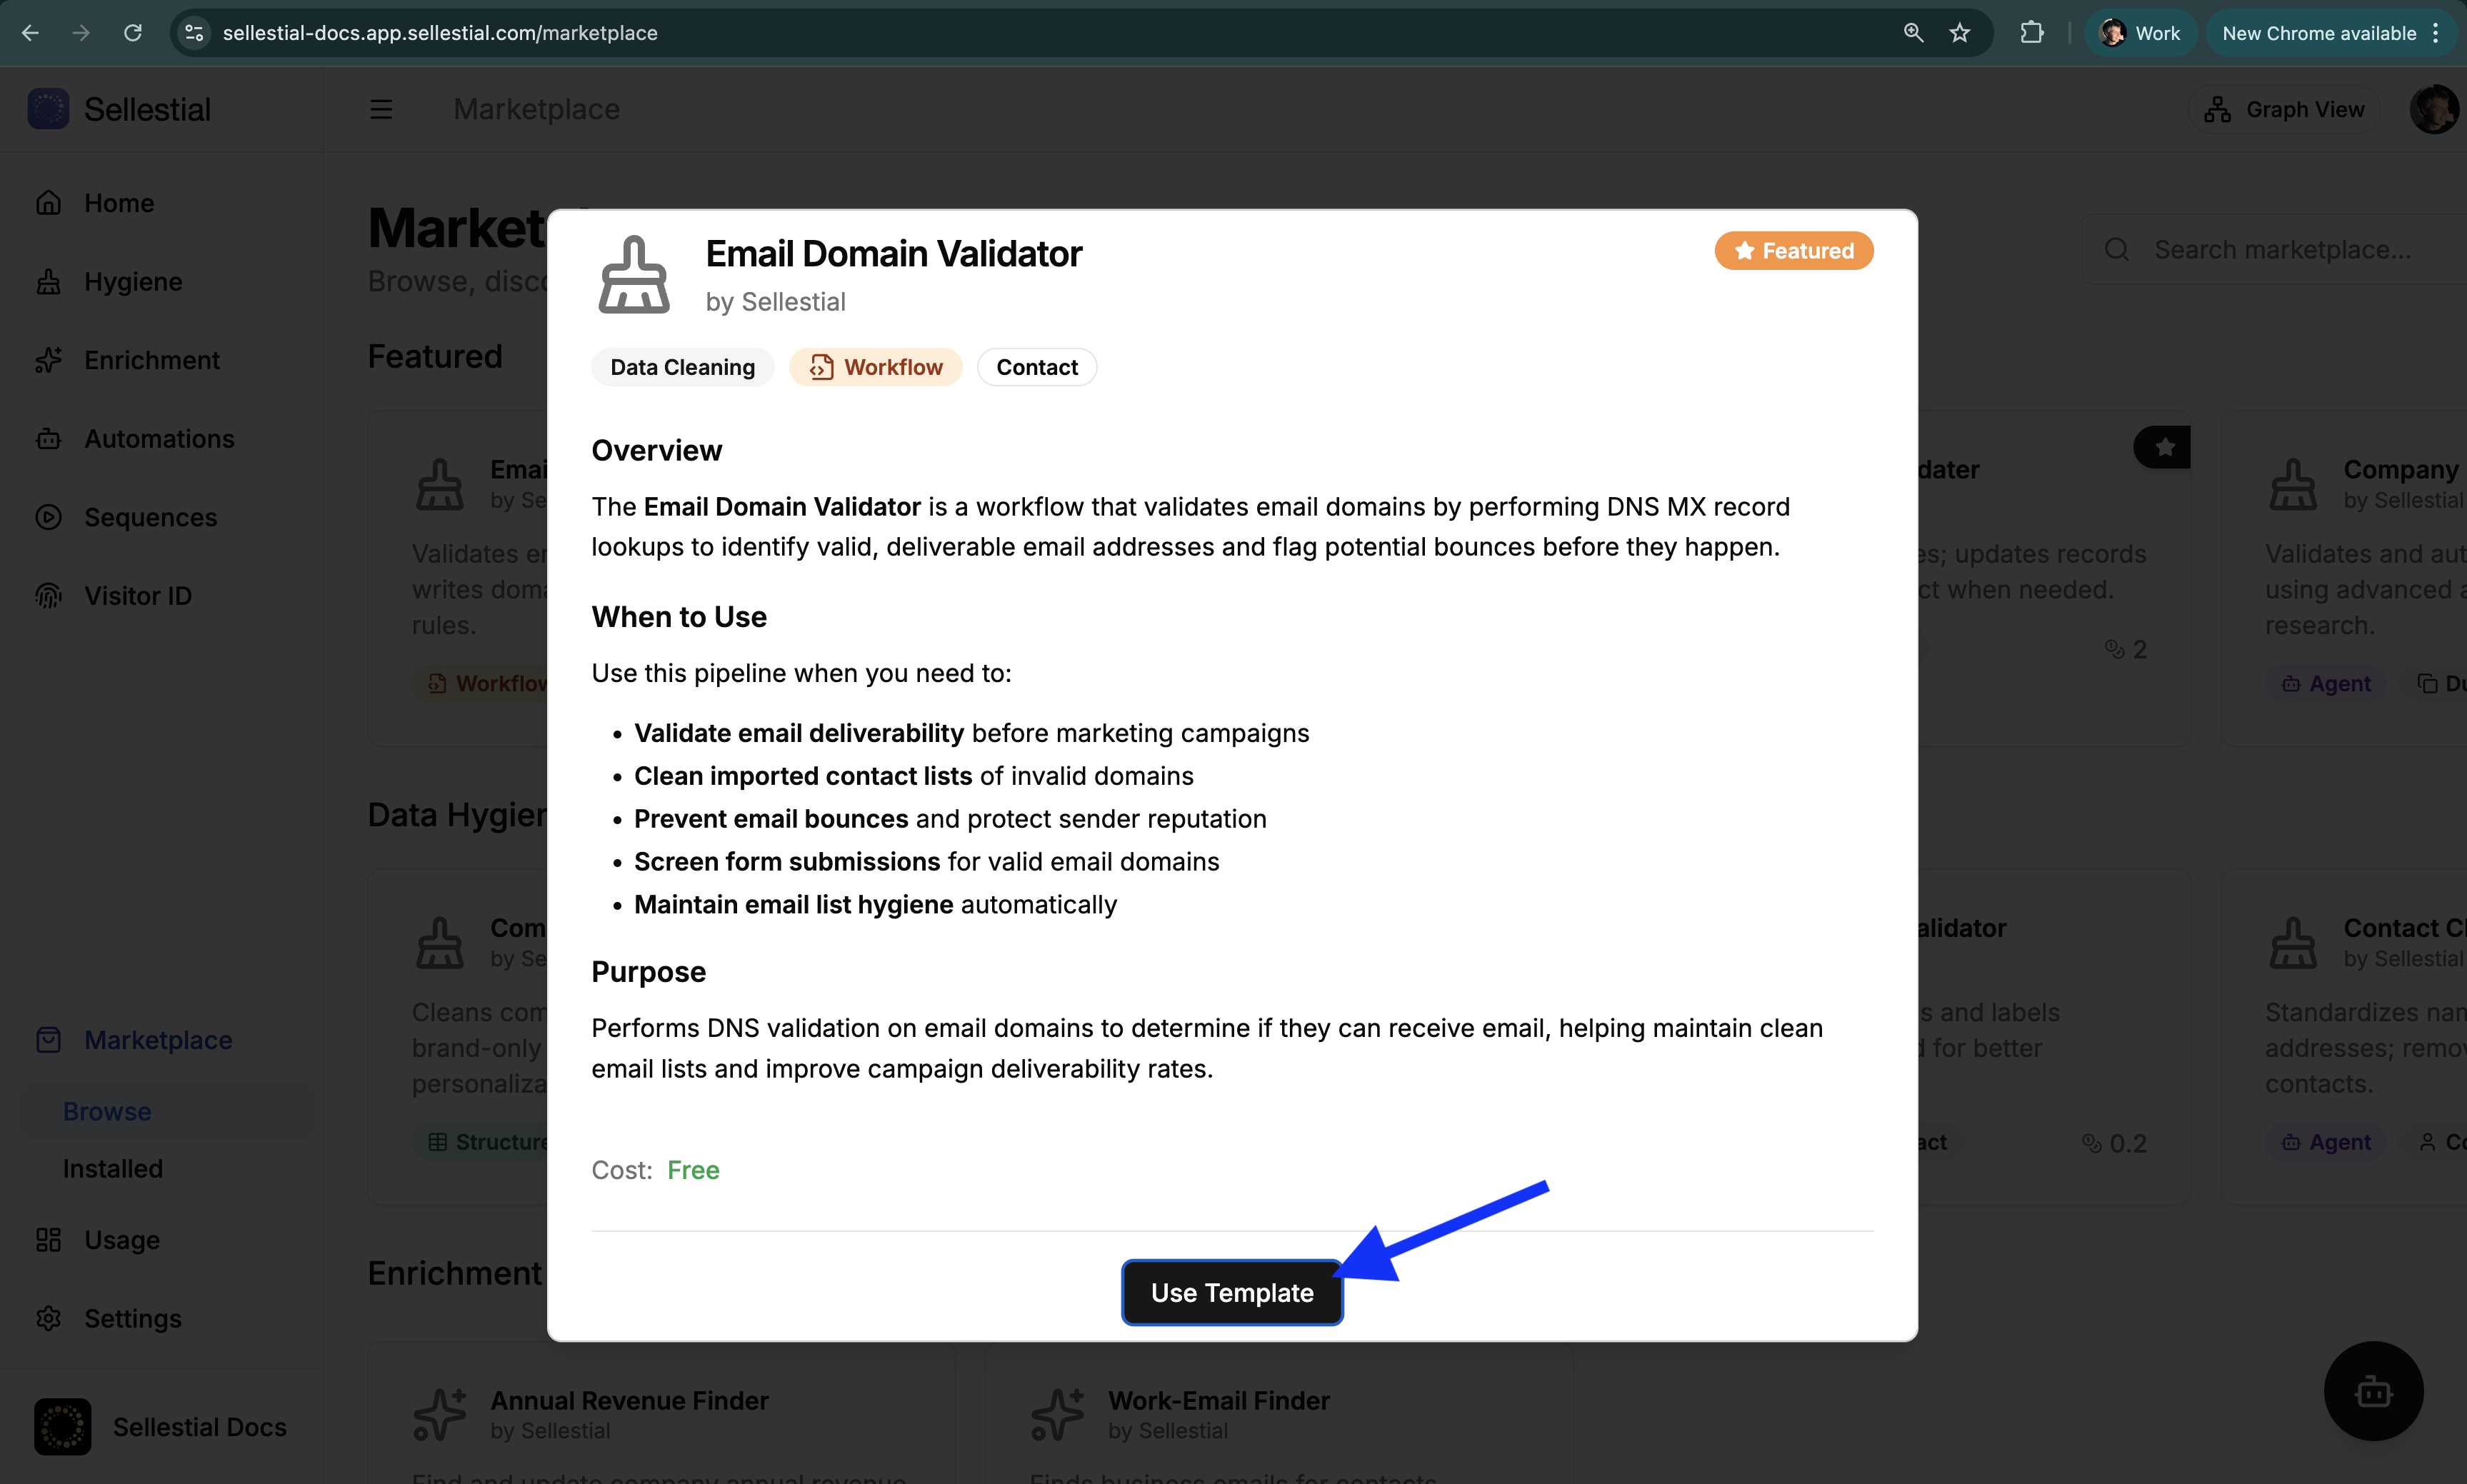
Sellestial will:
- Open up the RevOps Assistant to install and configure the pipeline
- Create a draft pipeline with default configuration
- If necessary, ask you to confirm certain actions
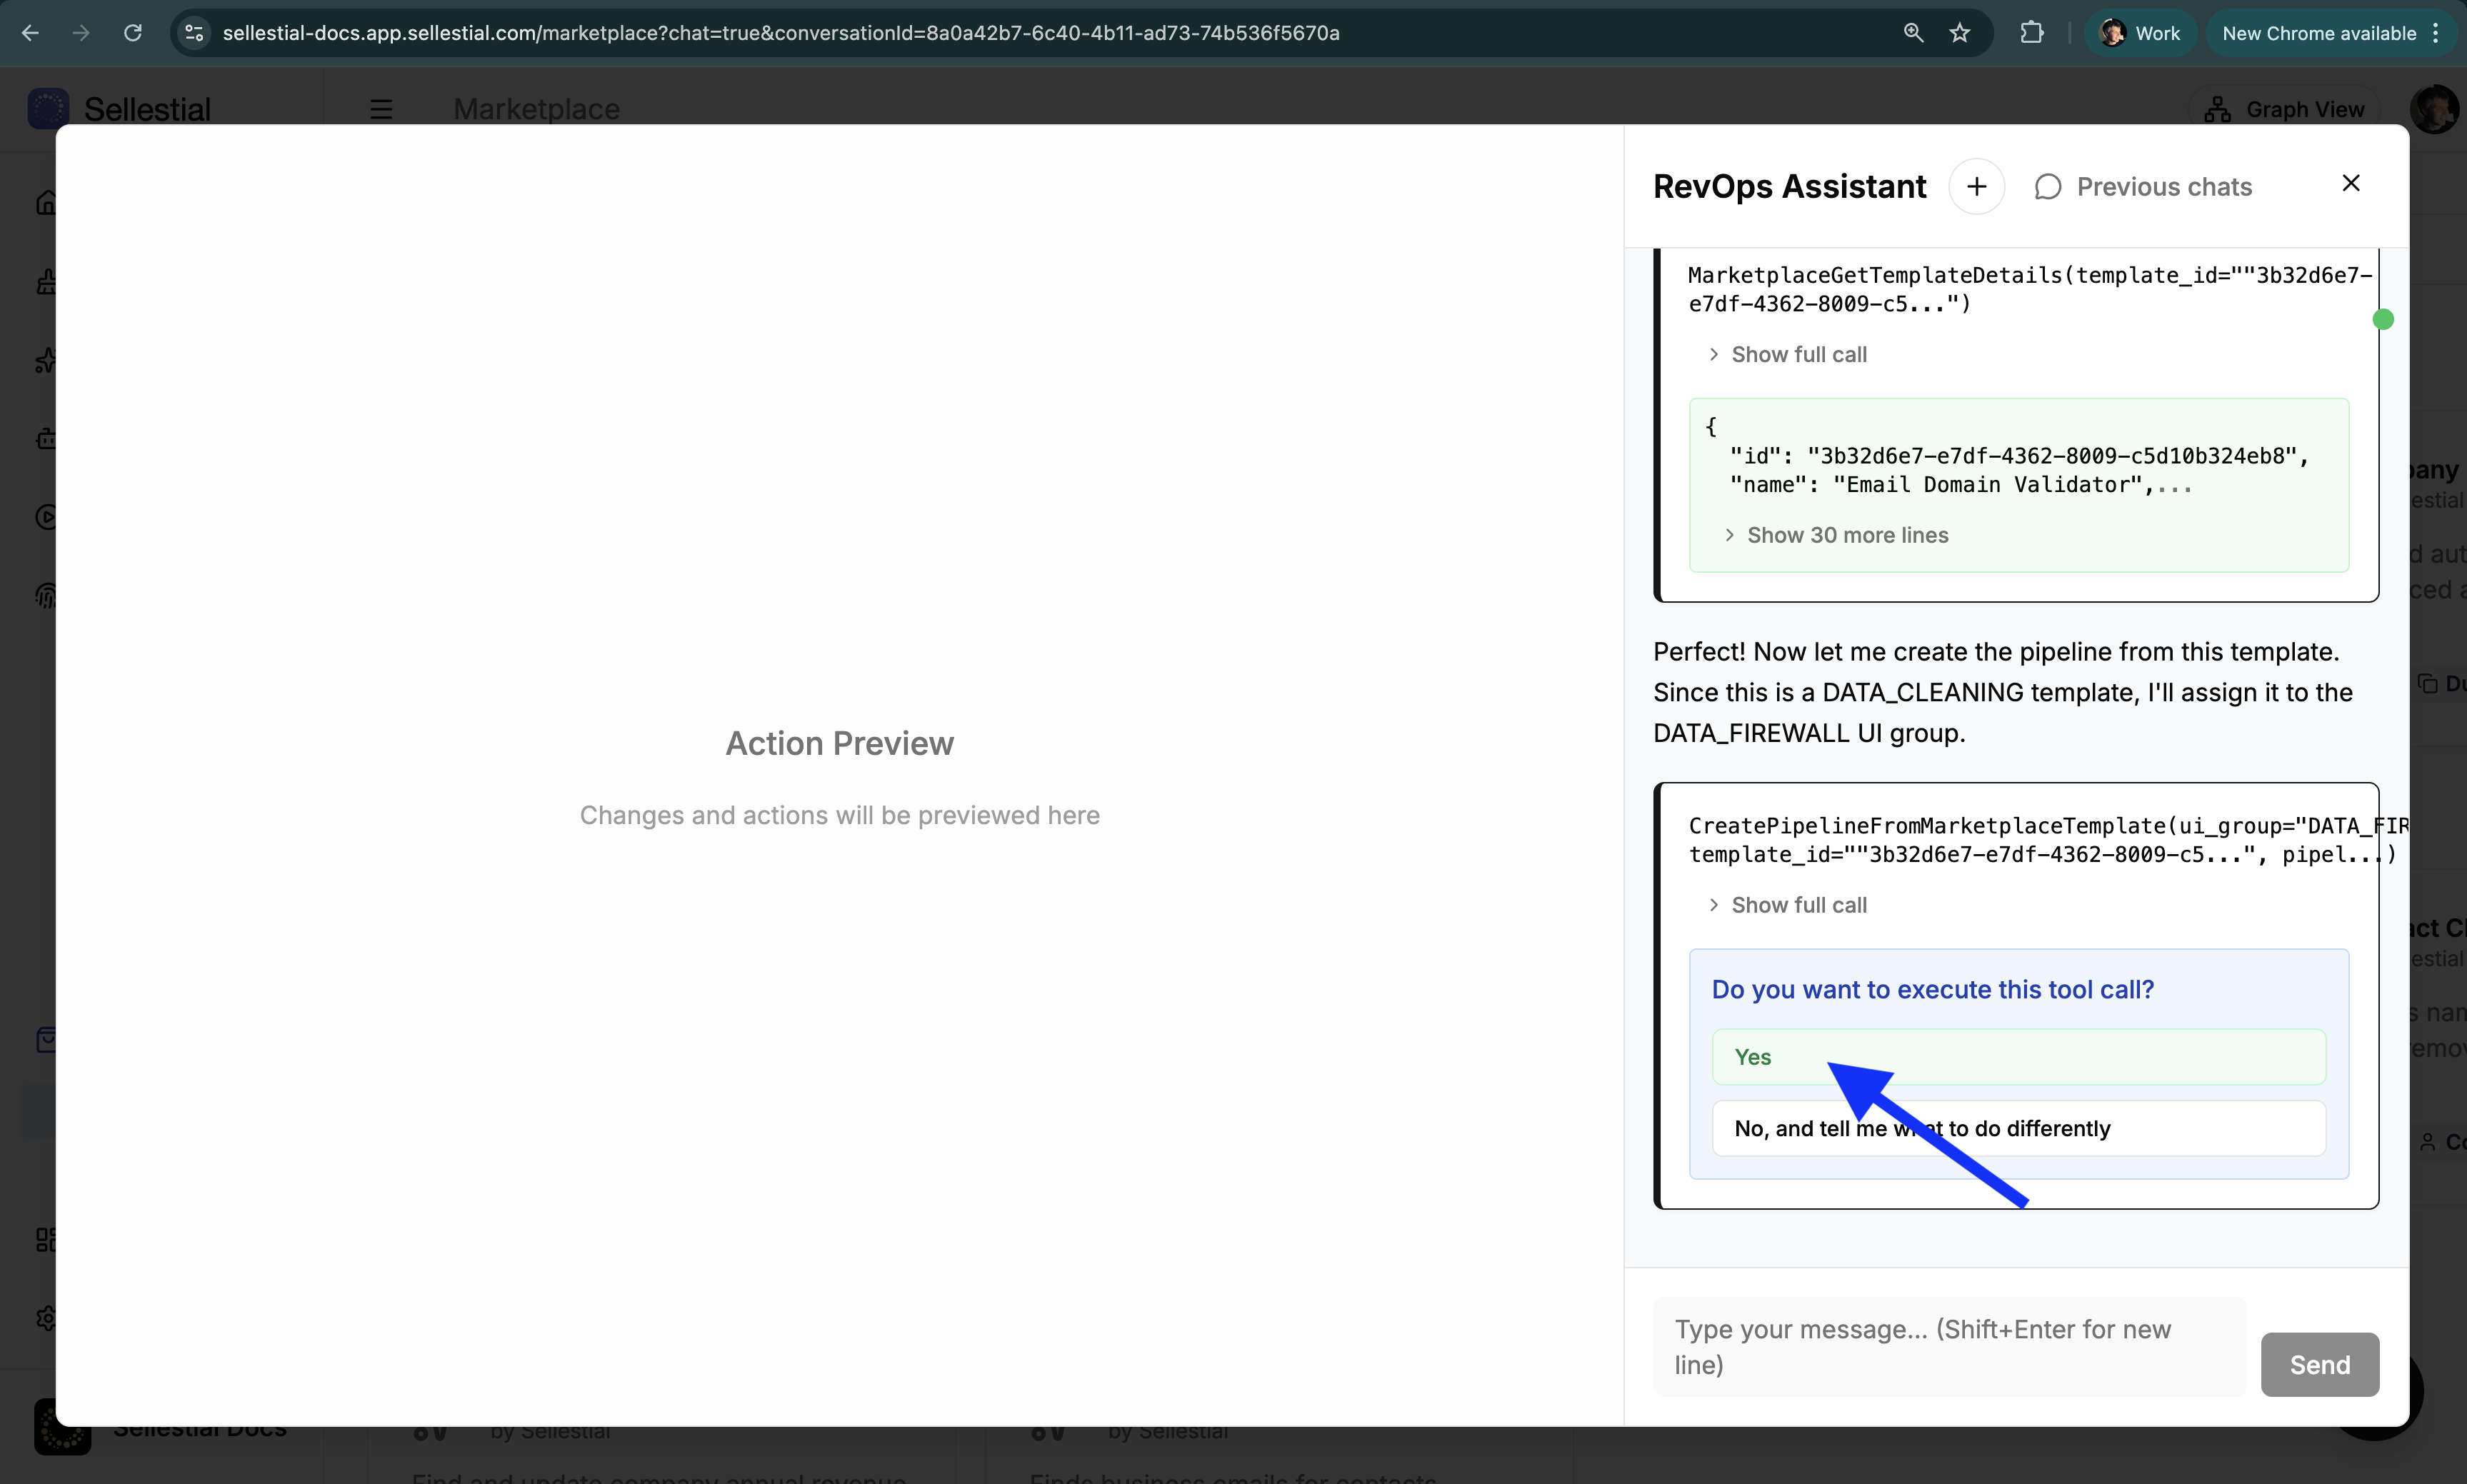 ImportantMake sure you carefully follow the RevOps Assistant’s chat dialog as it guides you through the process and helps you configure the pipeline.
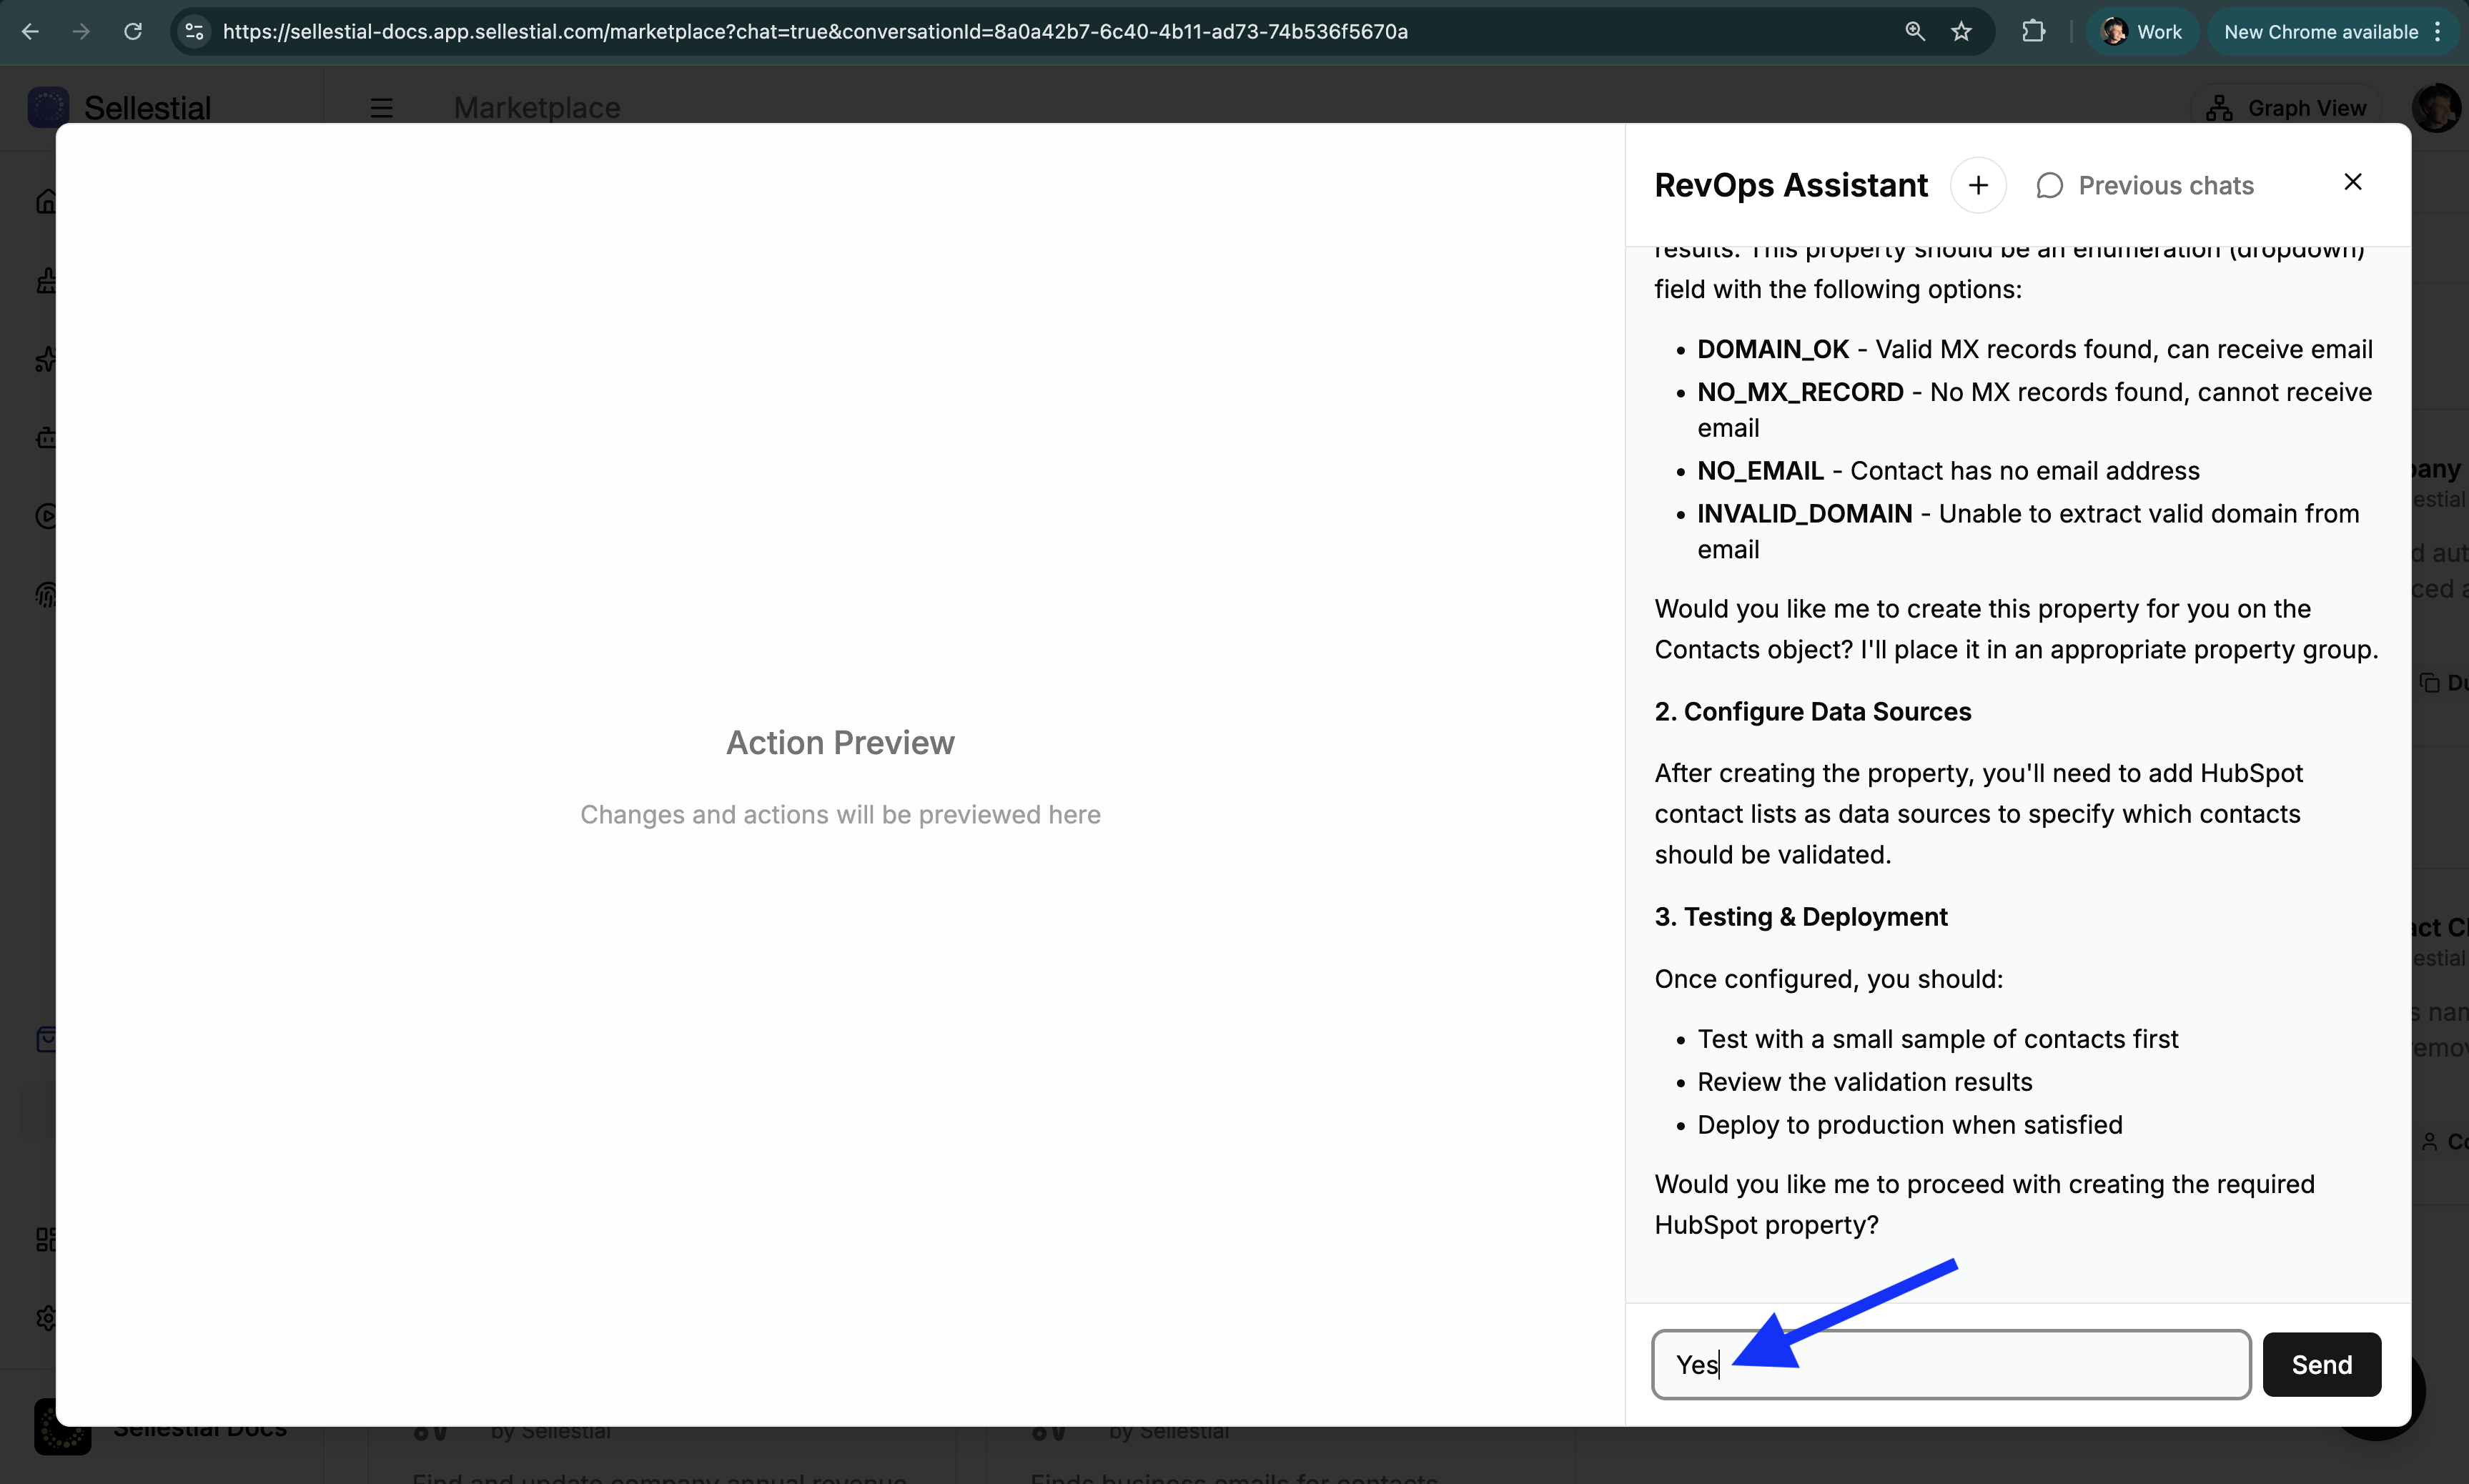 Key conceptYou can close the RevOps Assistant after the pipeline is installed. Depending on the semantics of the pipeline, you will find it in the Hygiene, Enrichment or Automations section on the left sidebar to configure it further.
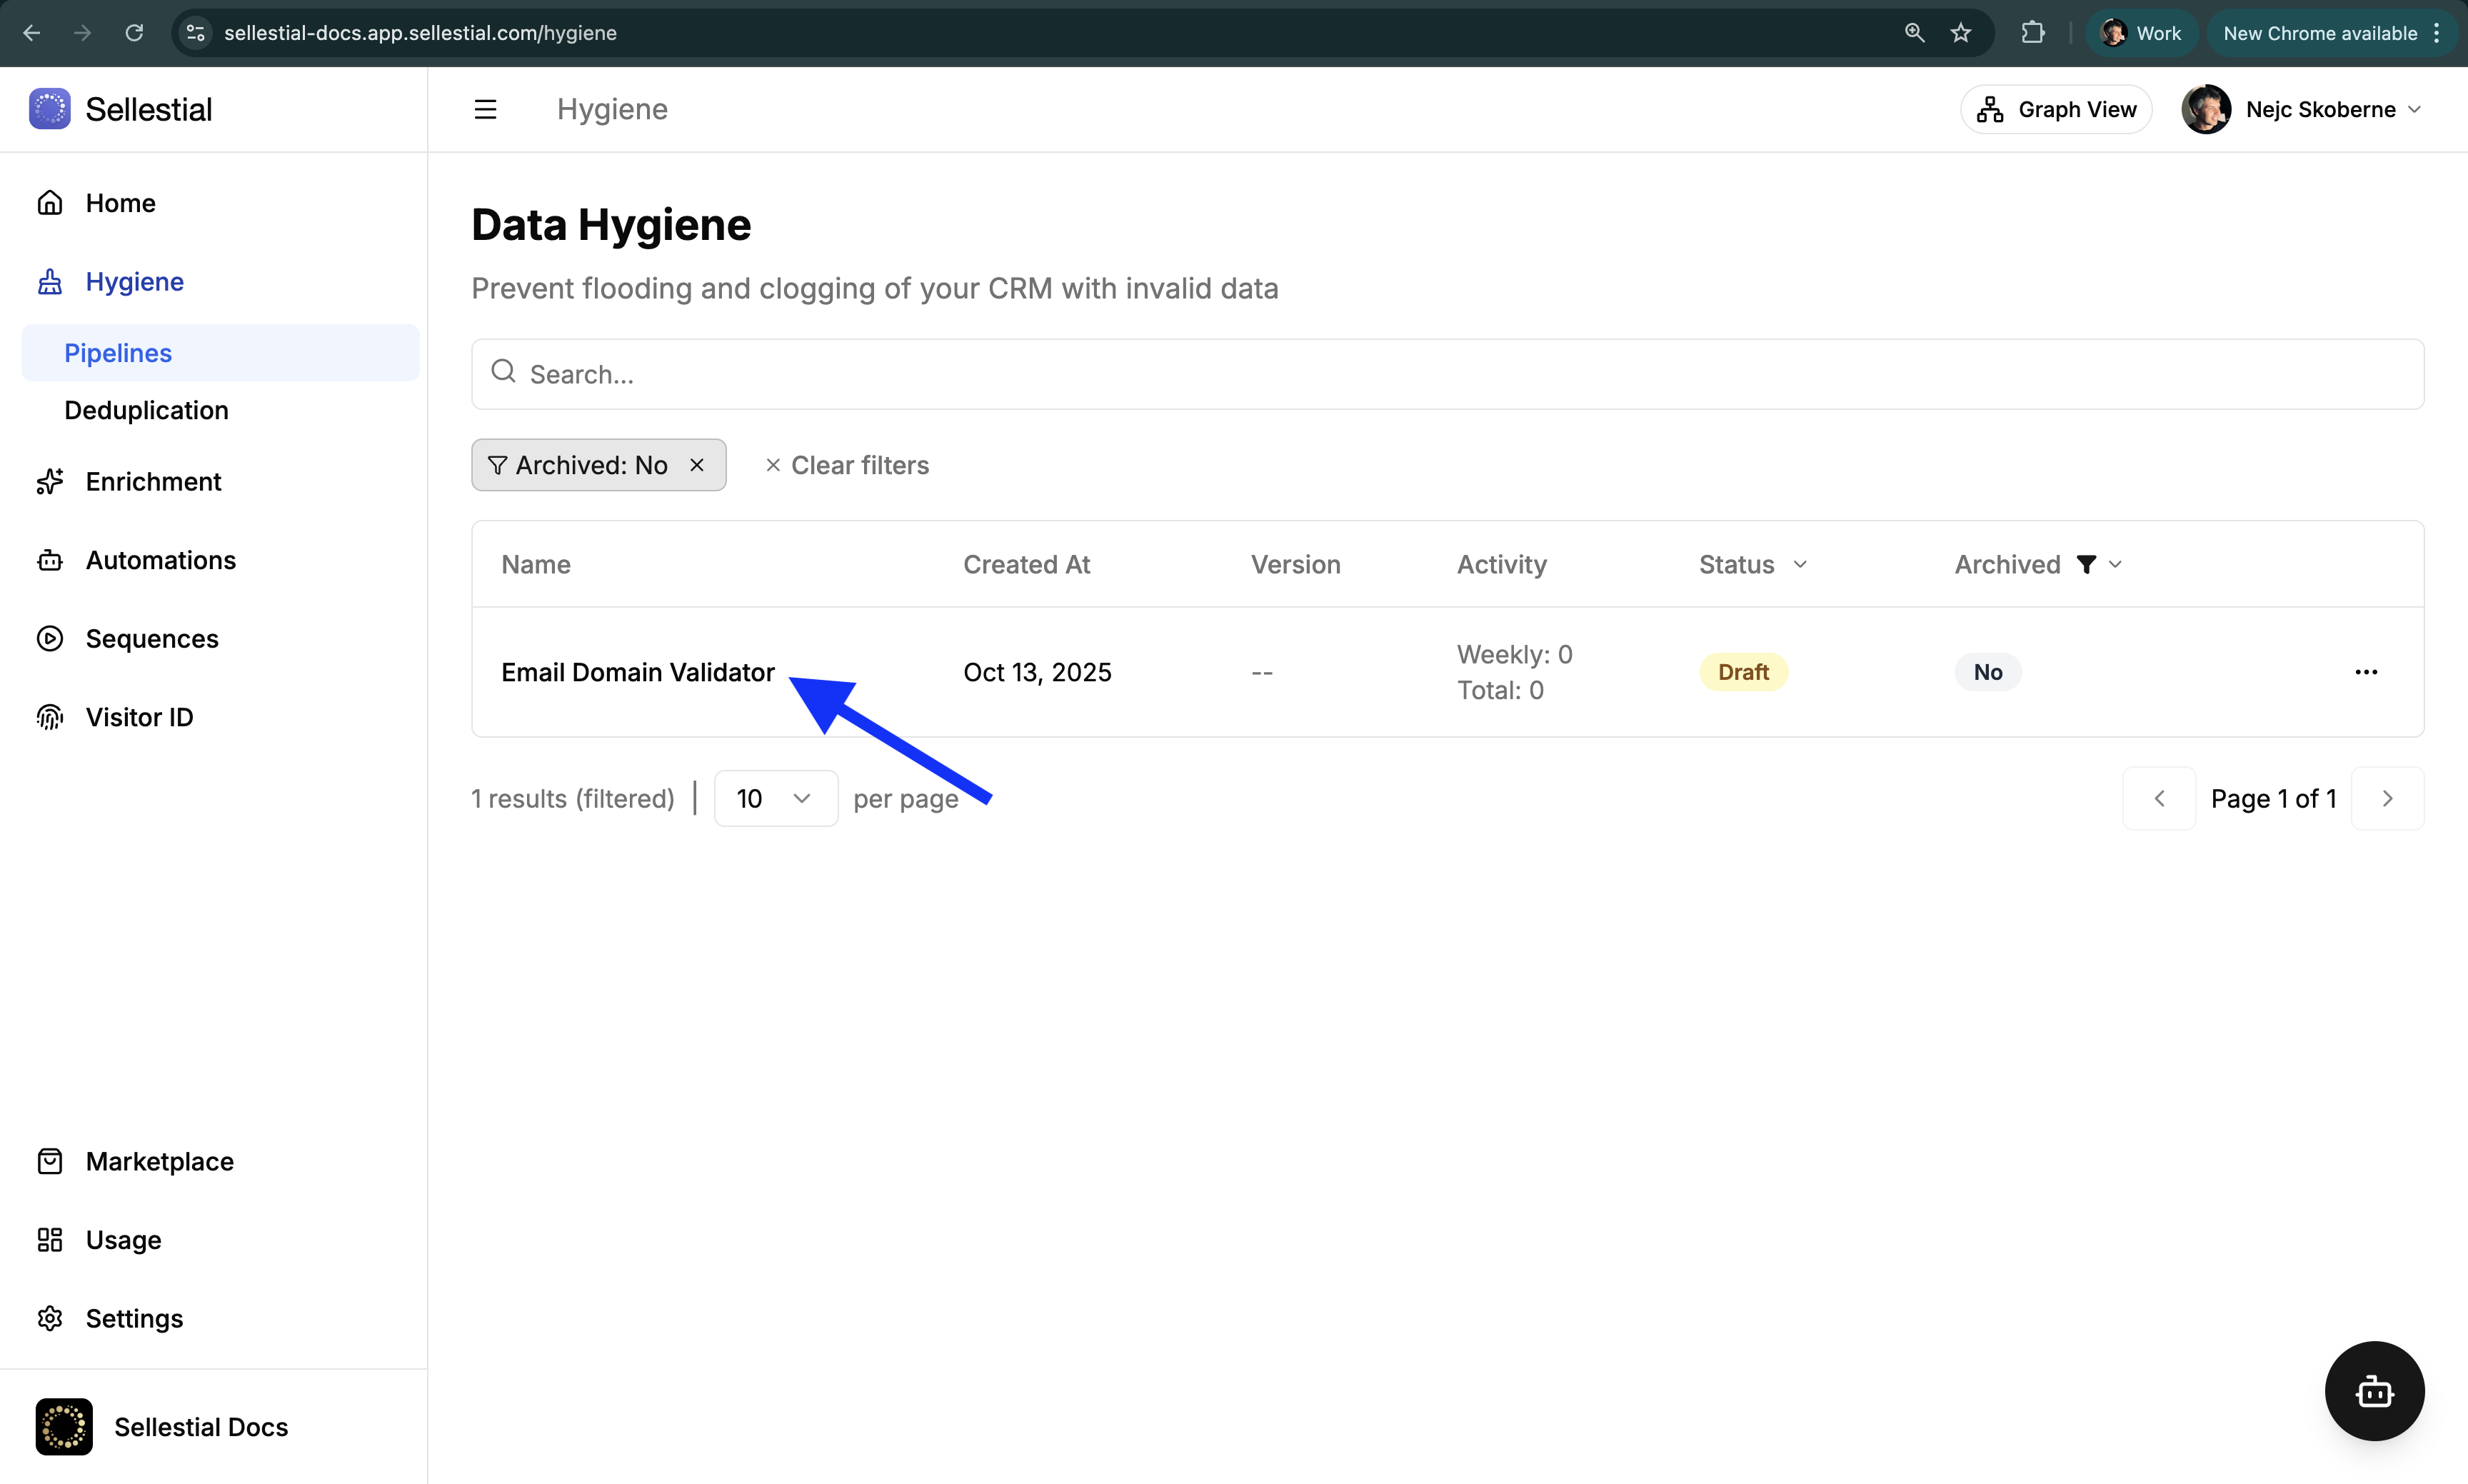
-
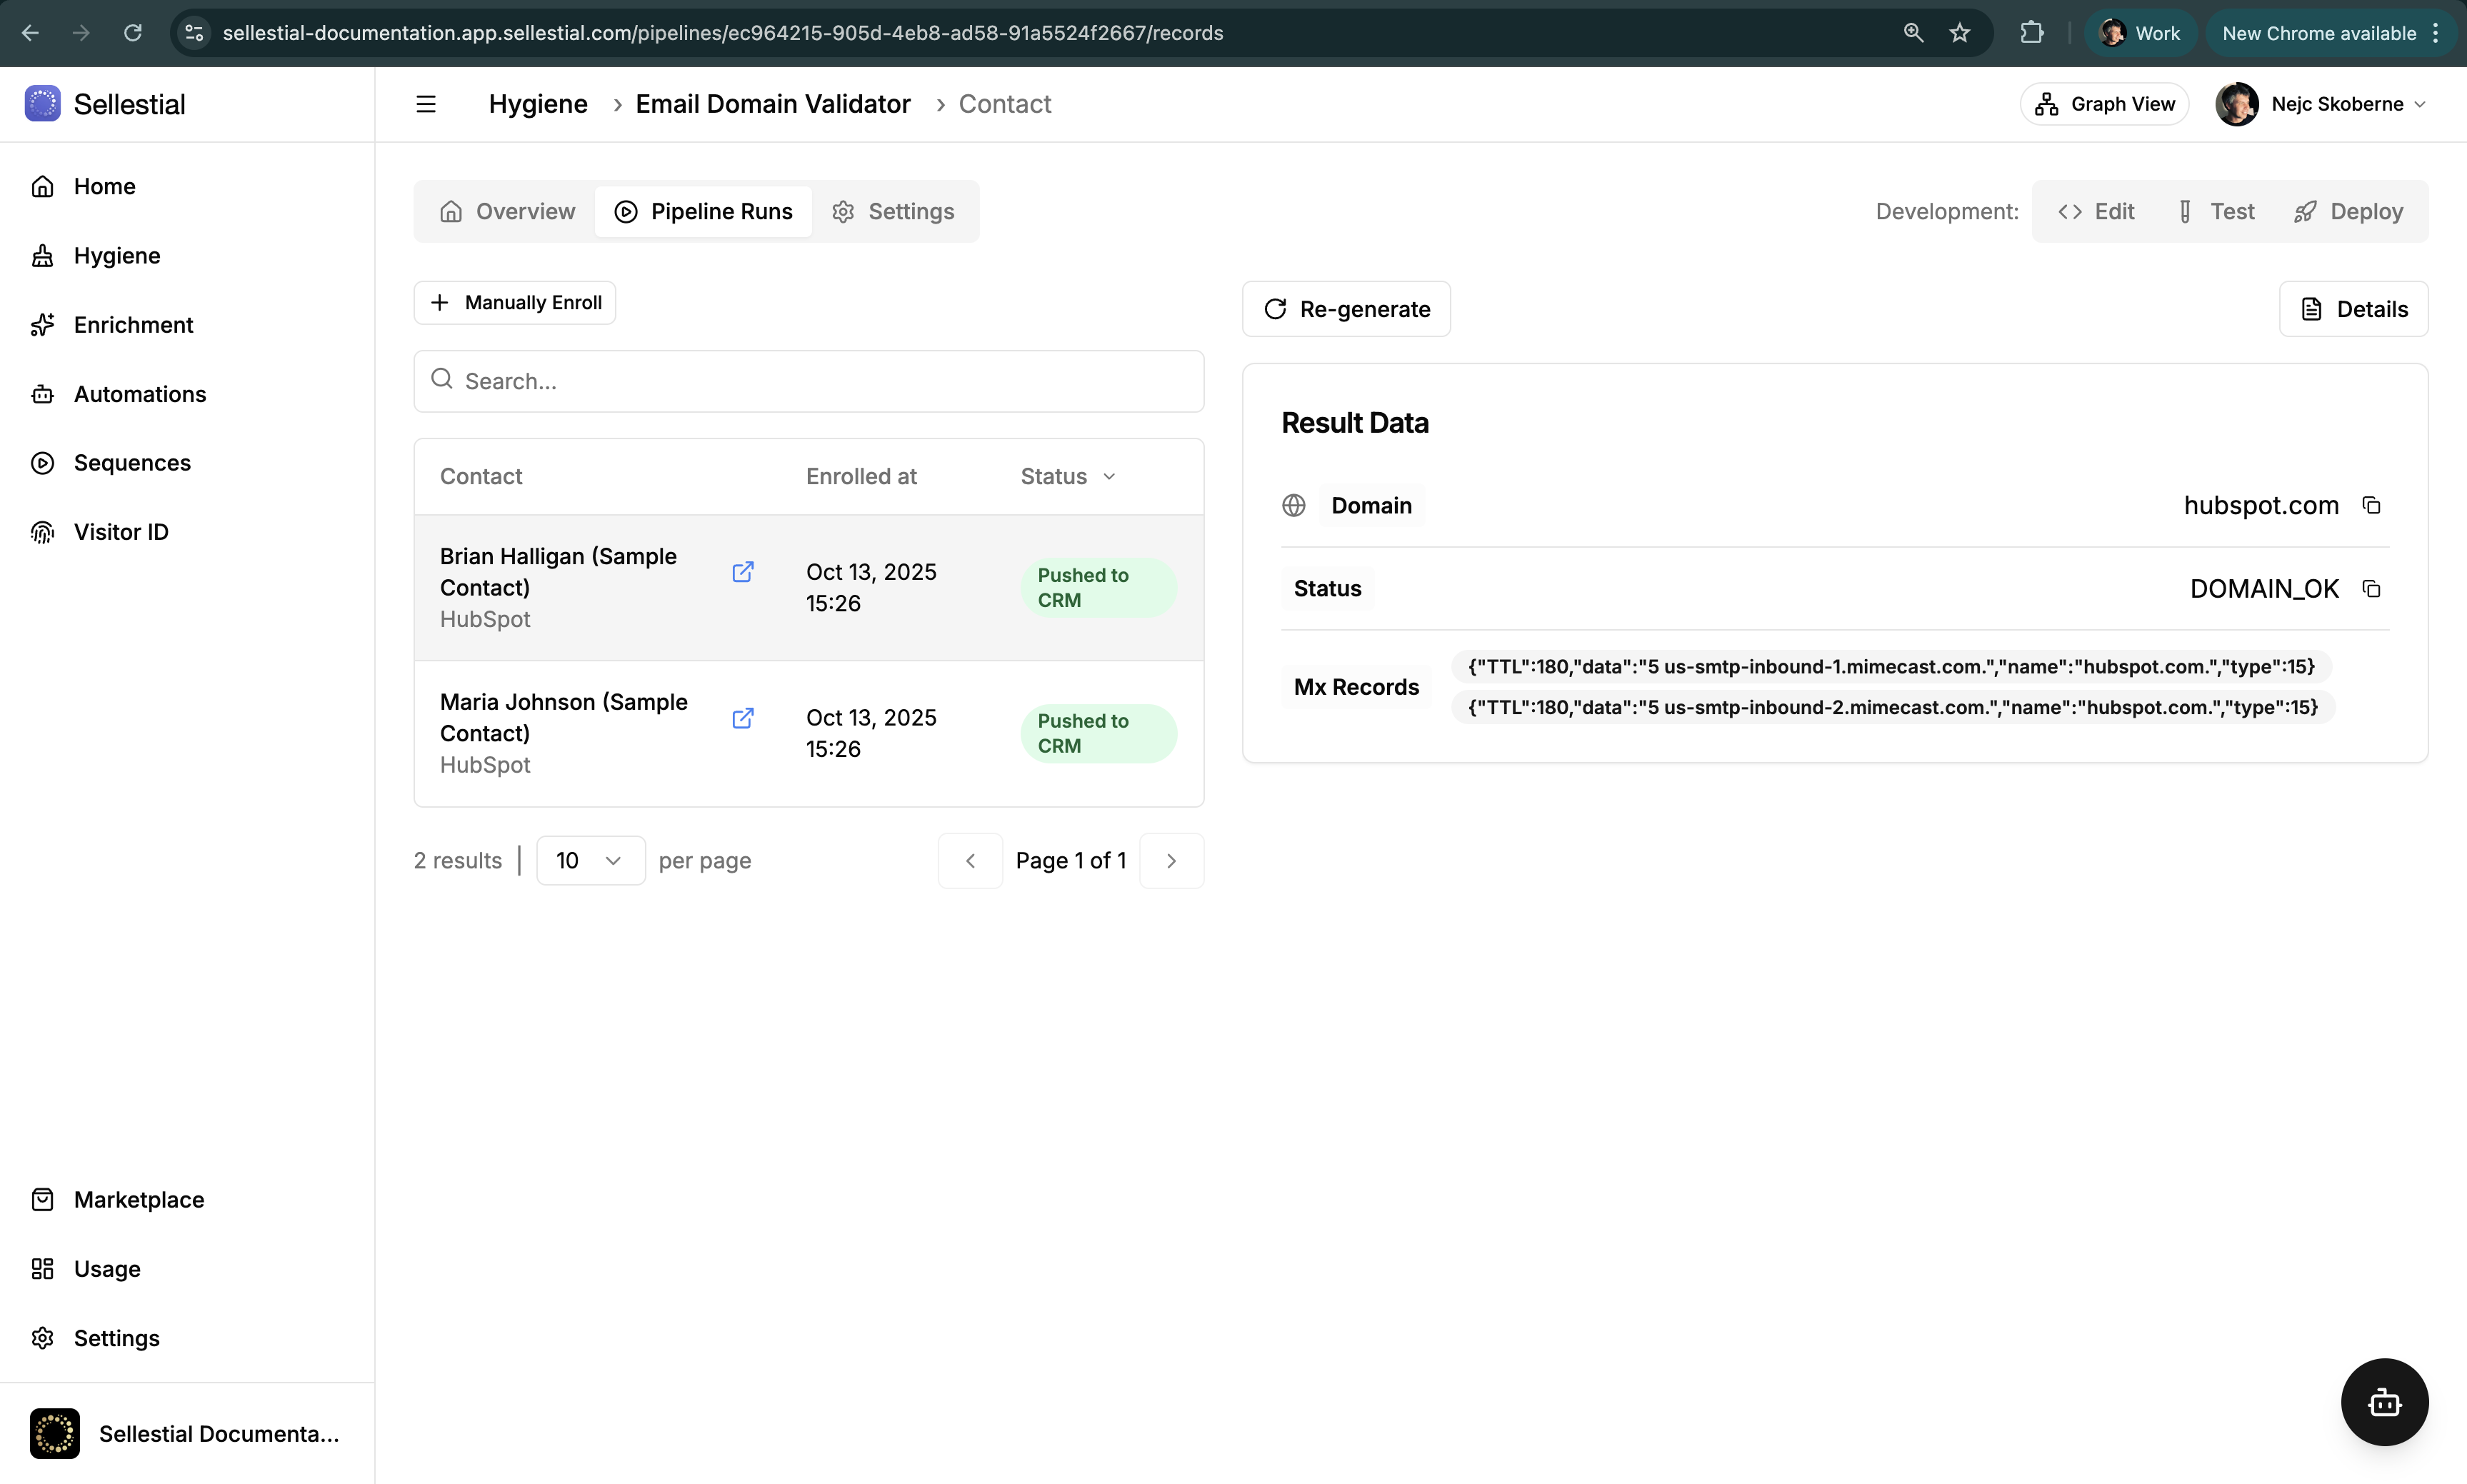
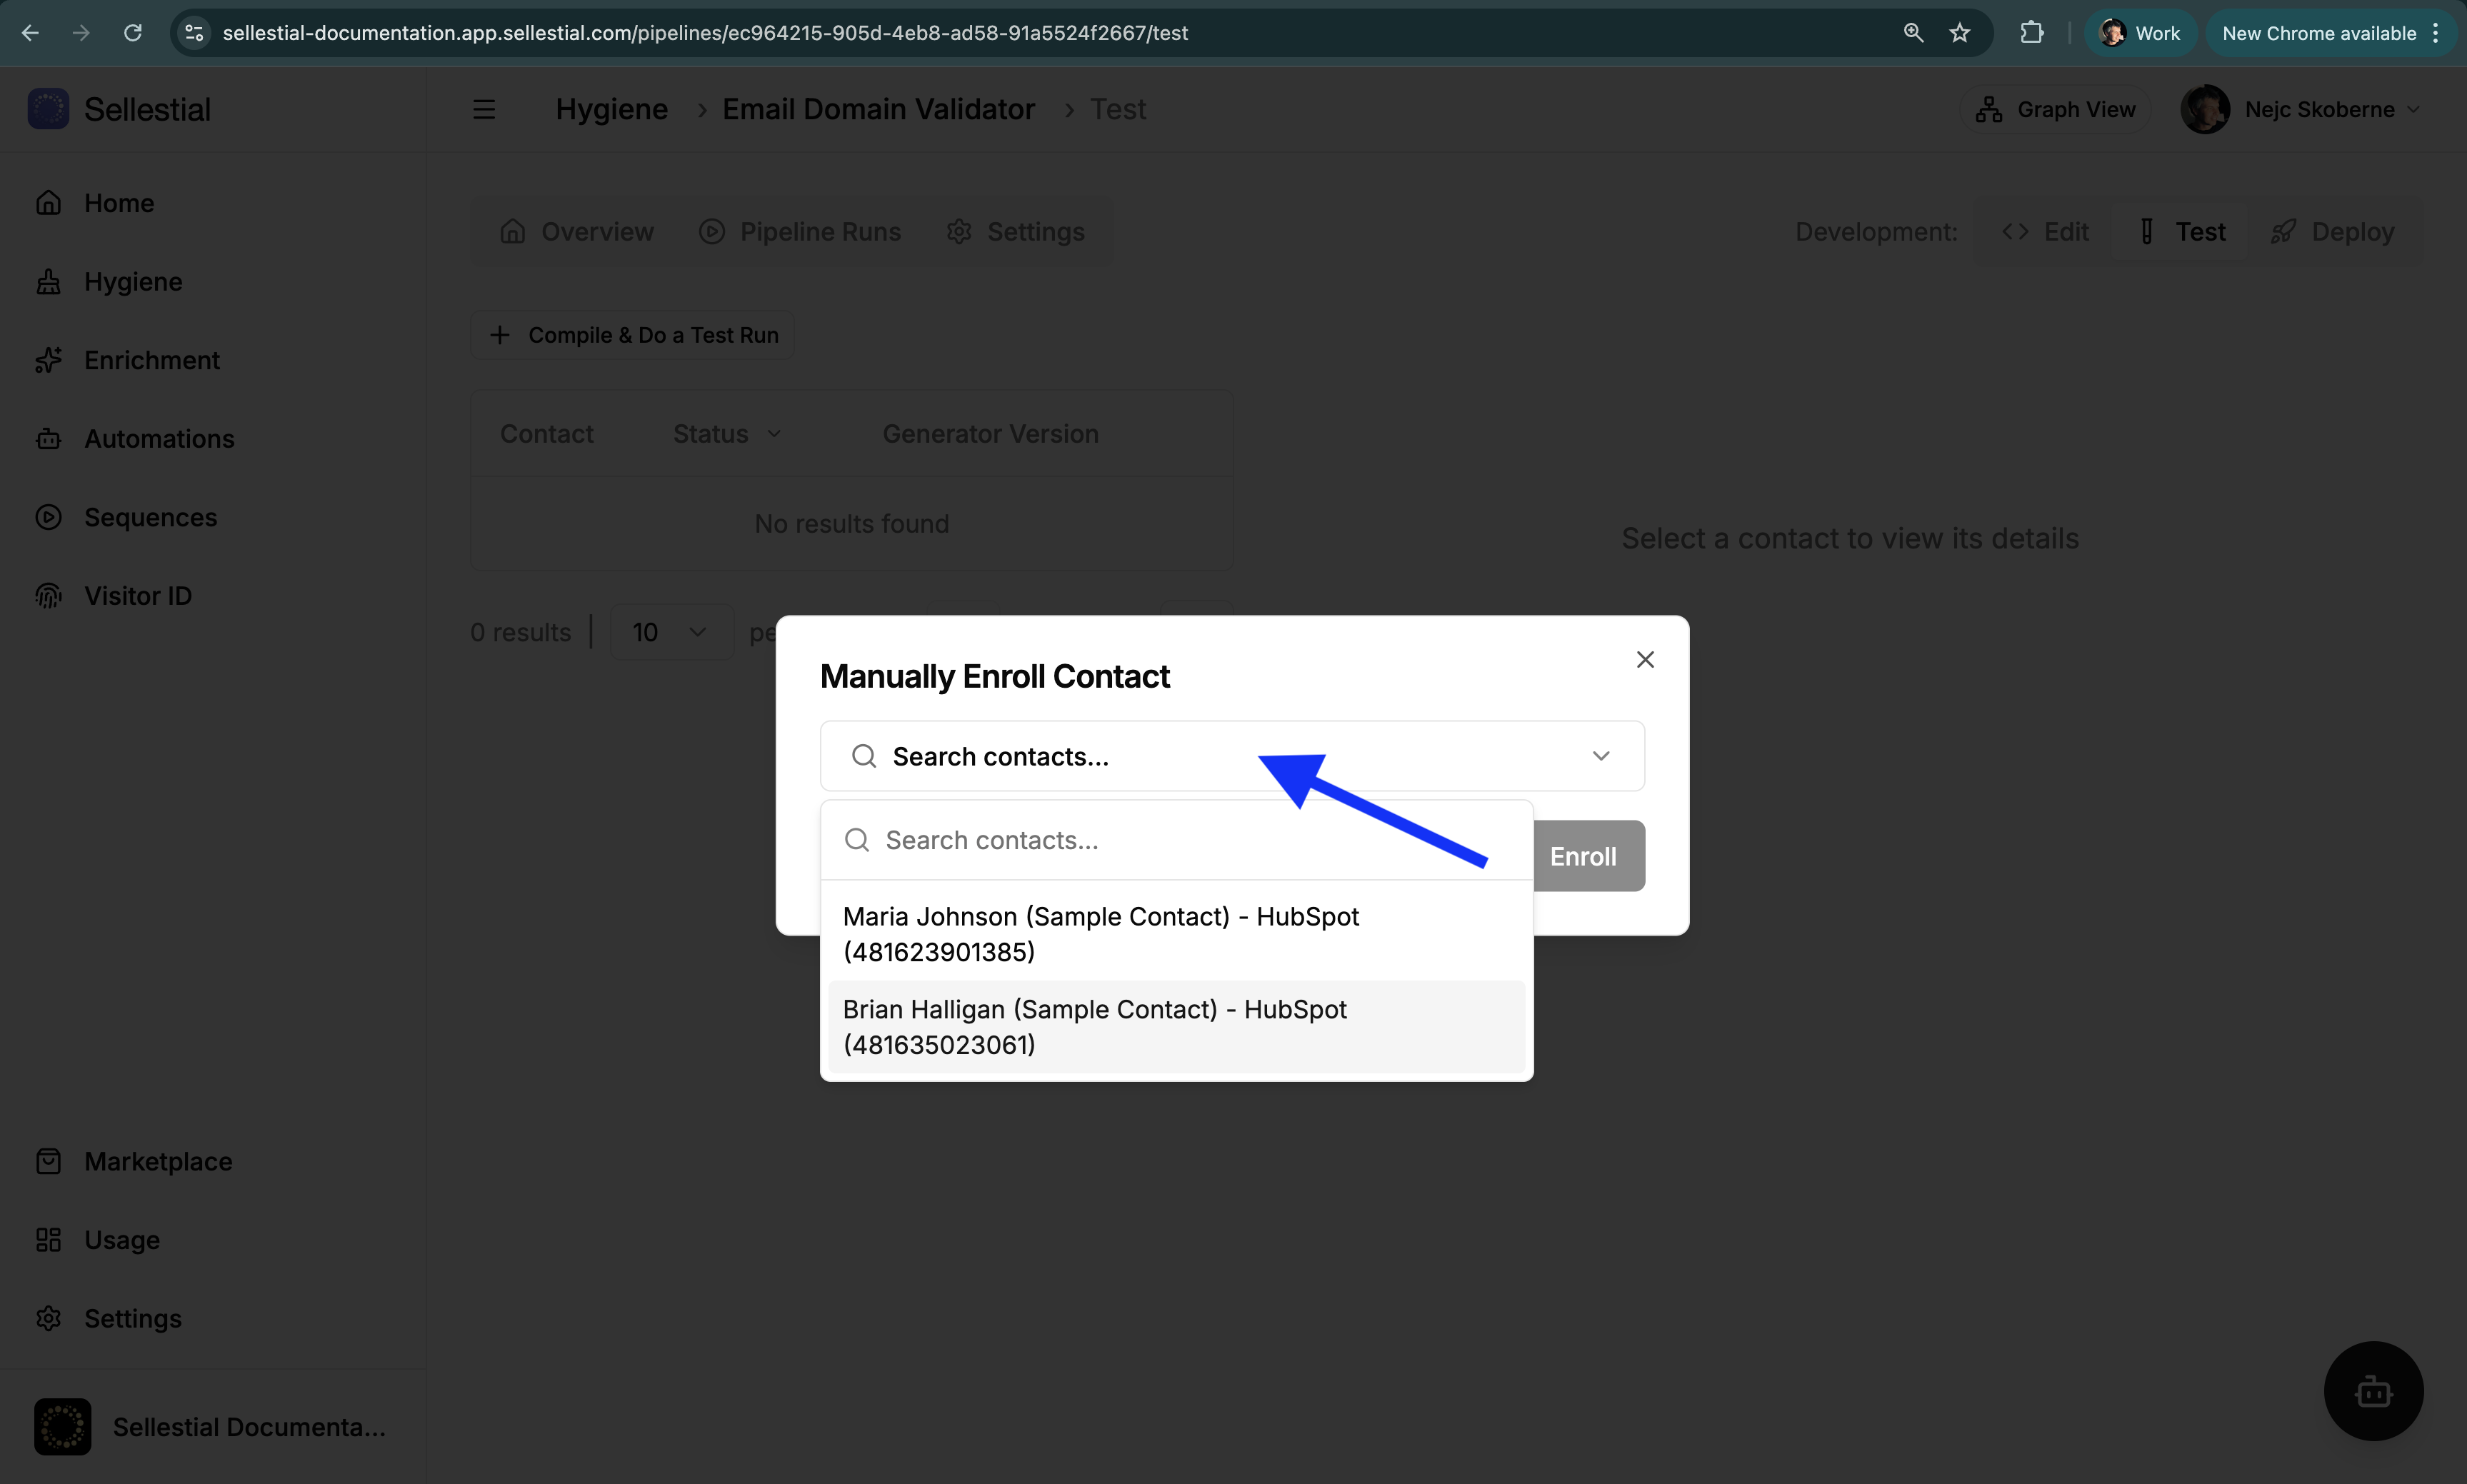
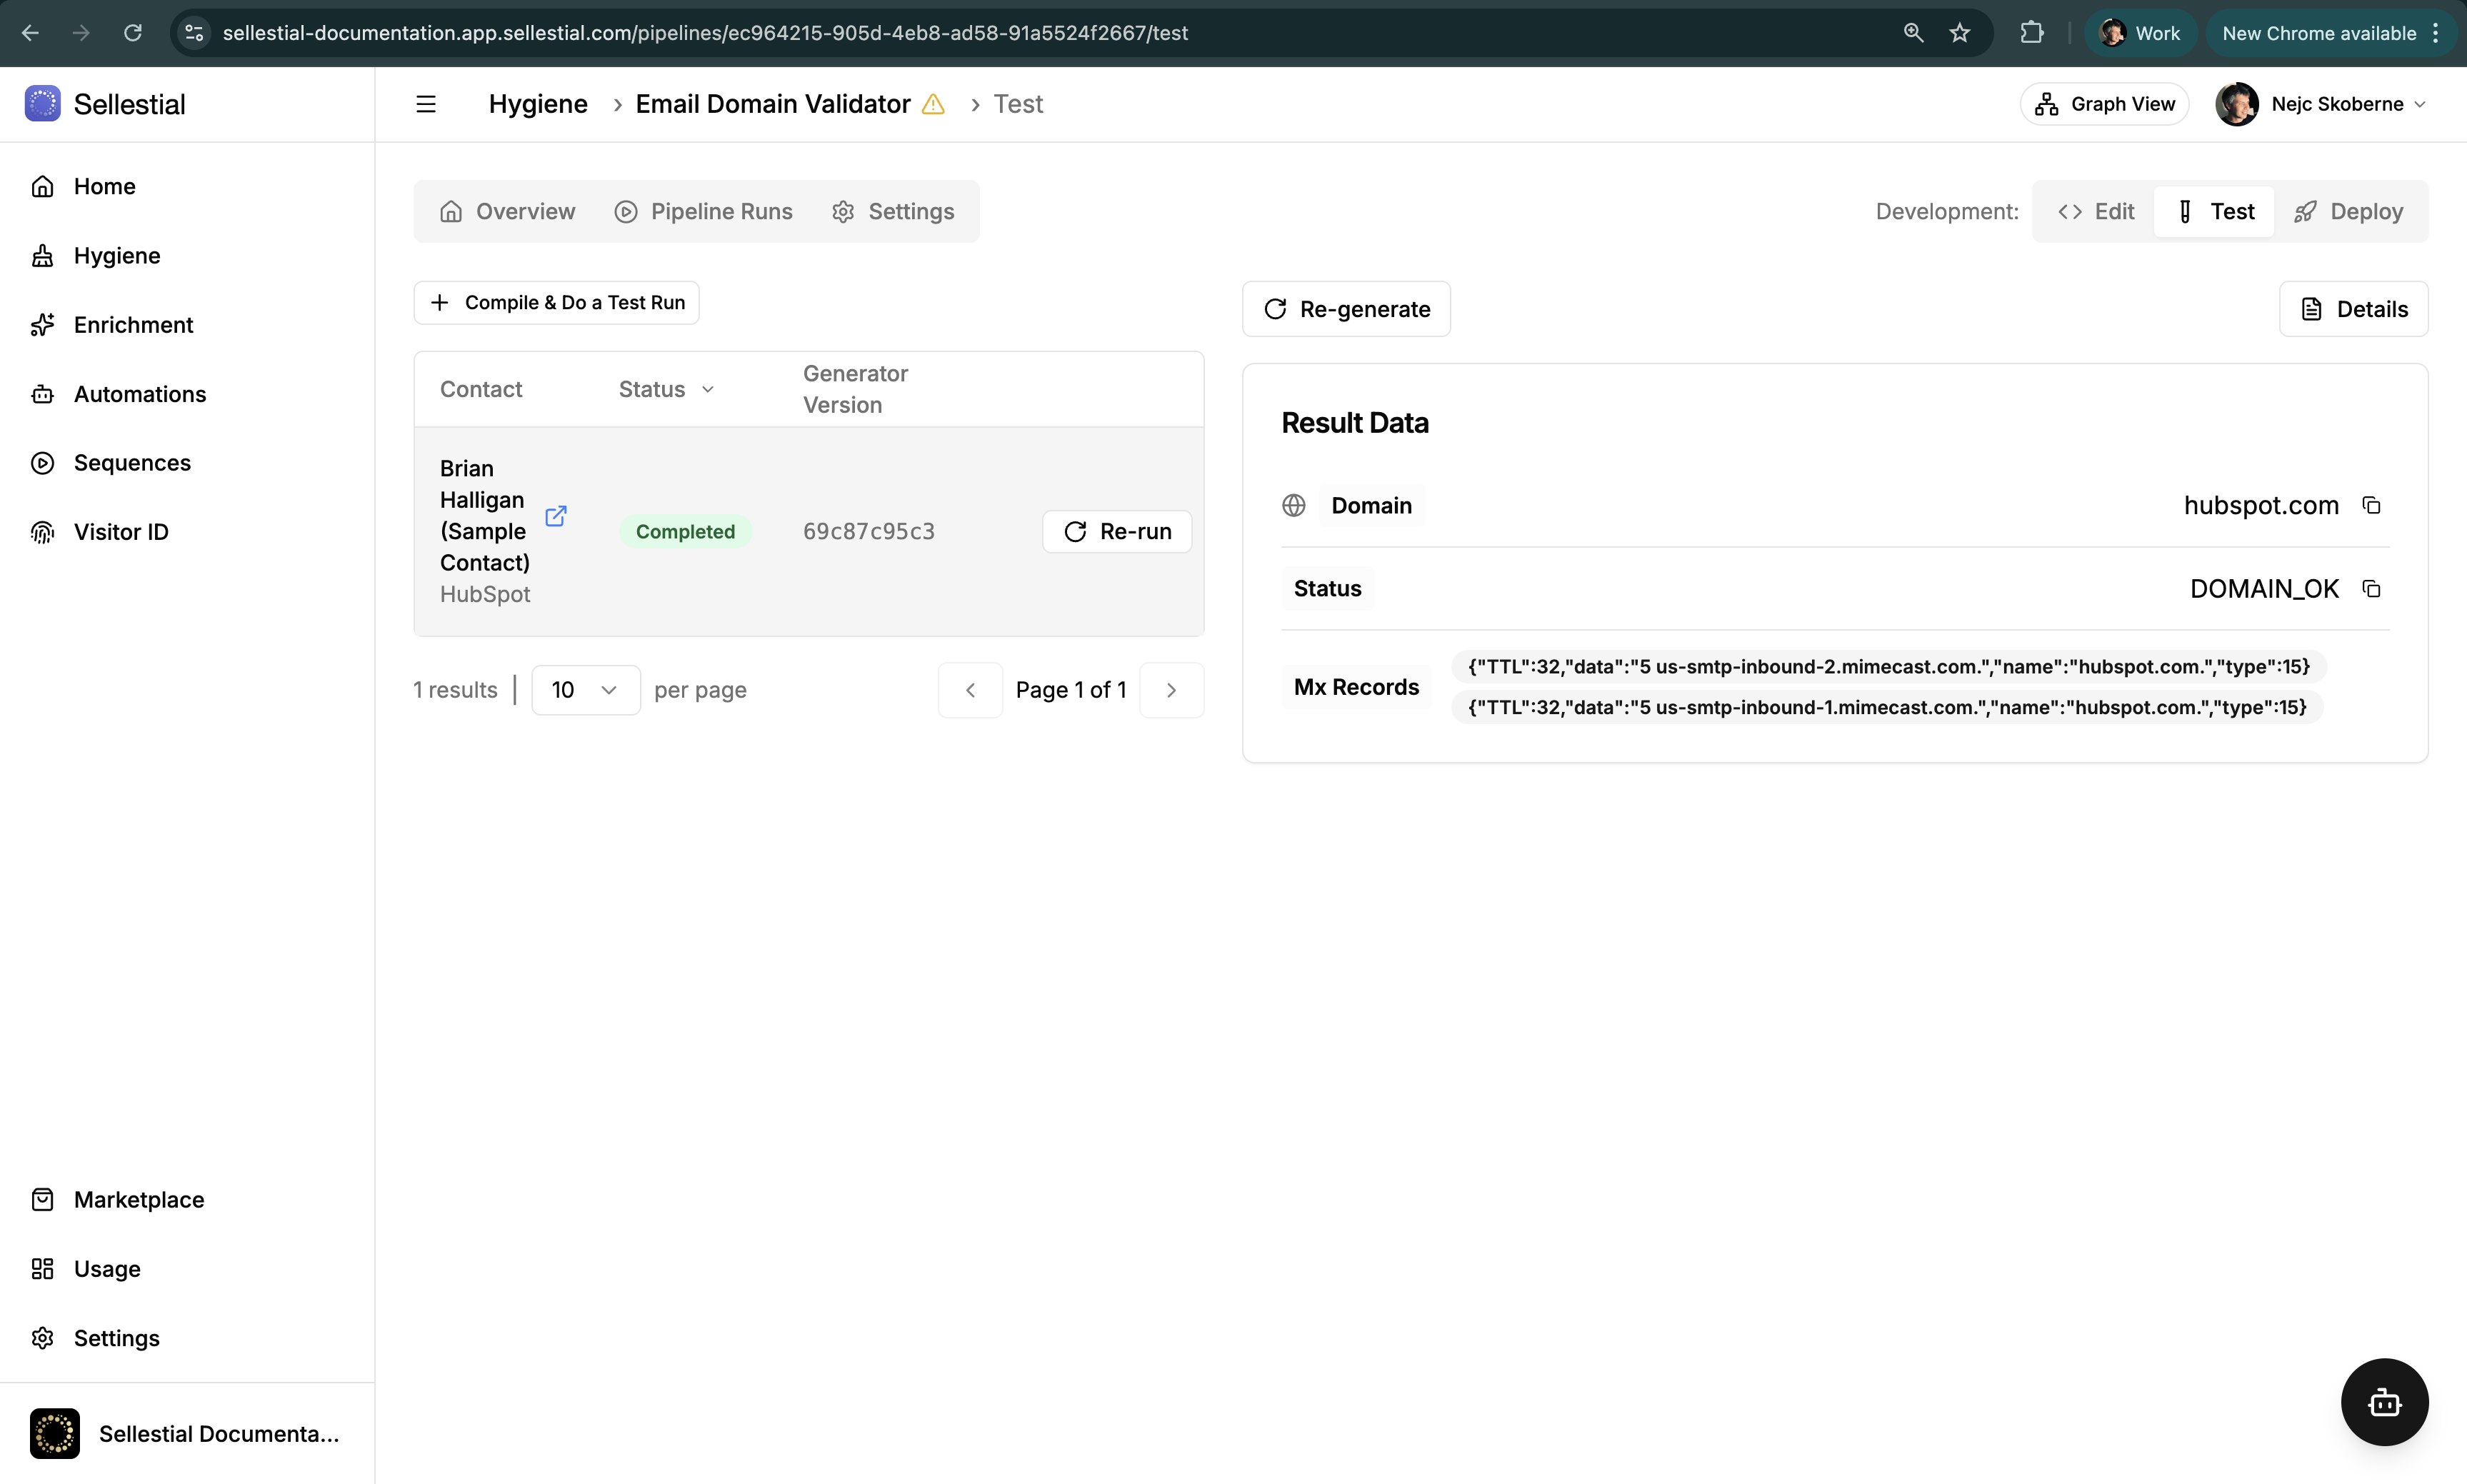
Run First Test
In the pipeline’s Test tab, click Compile & Do a Test Run to enroll test records into the pipeline.
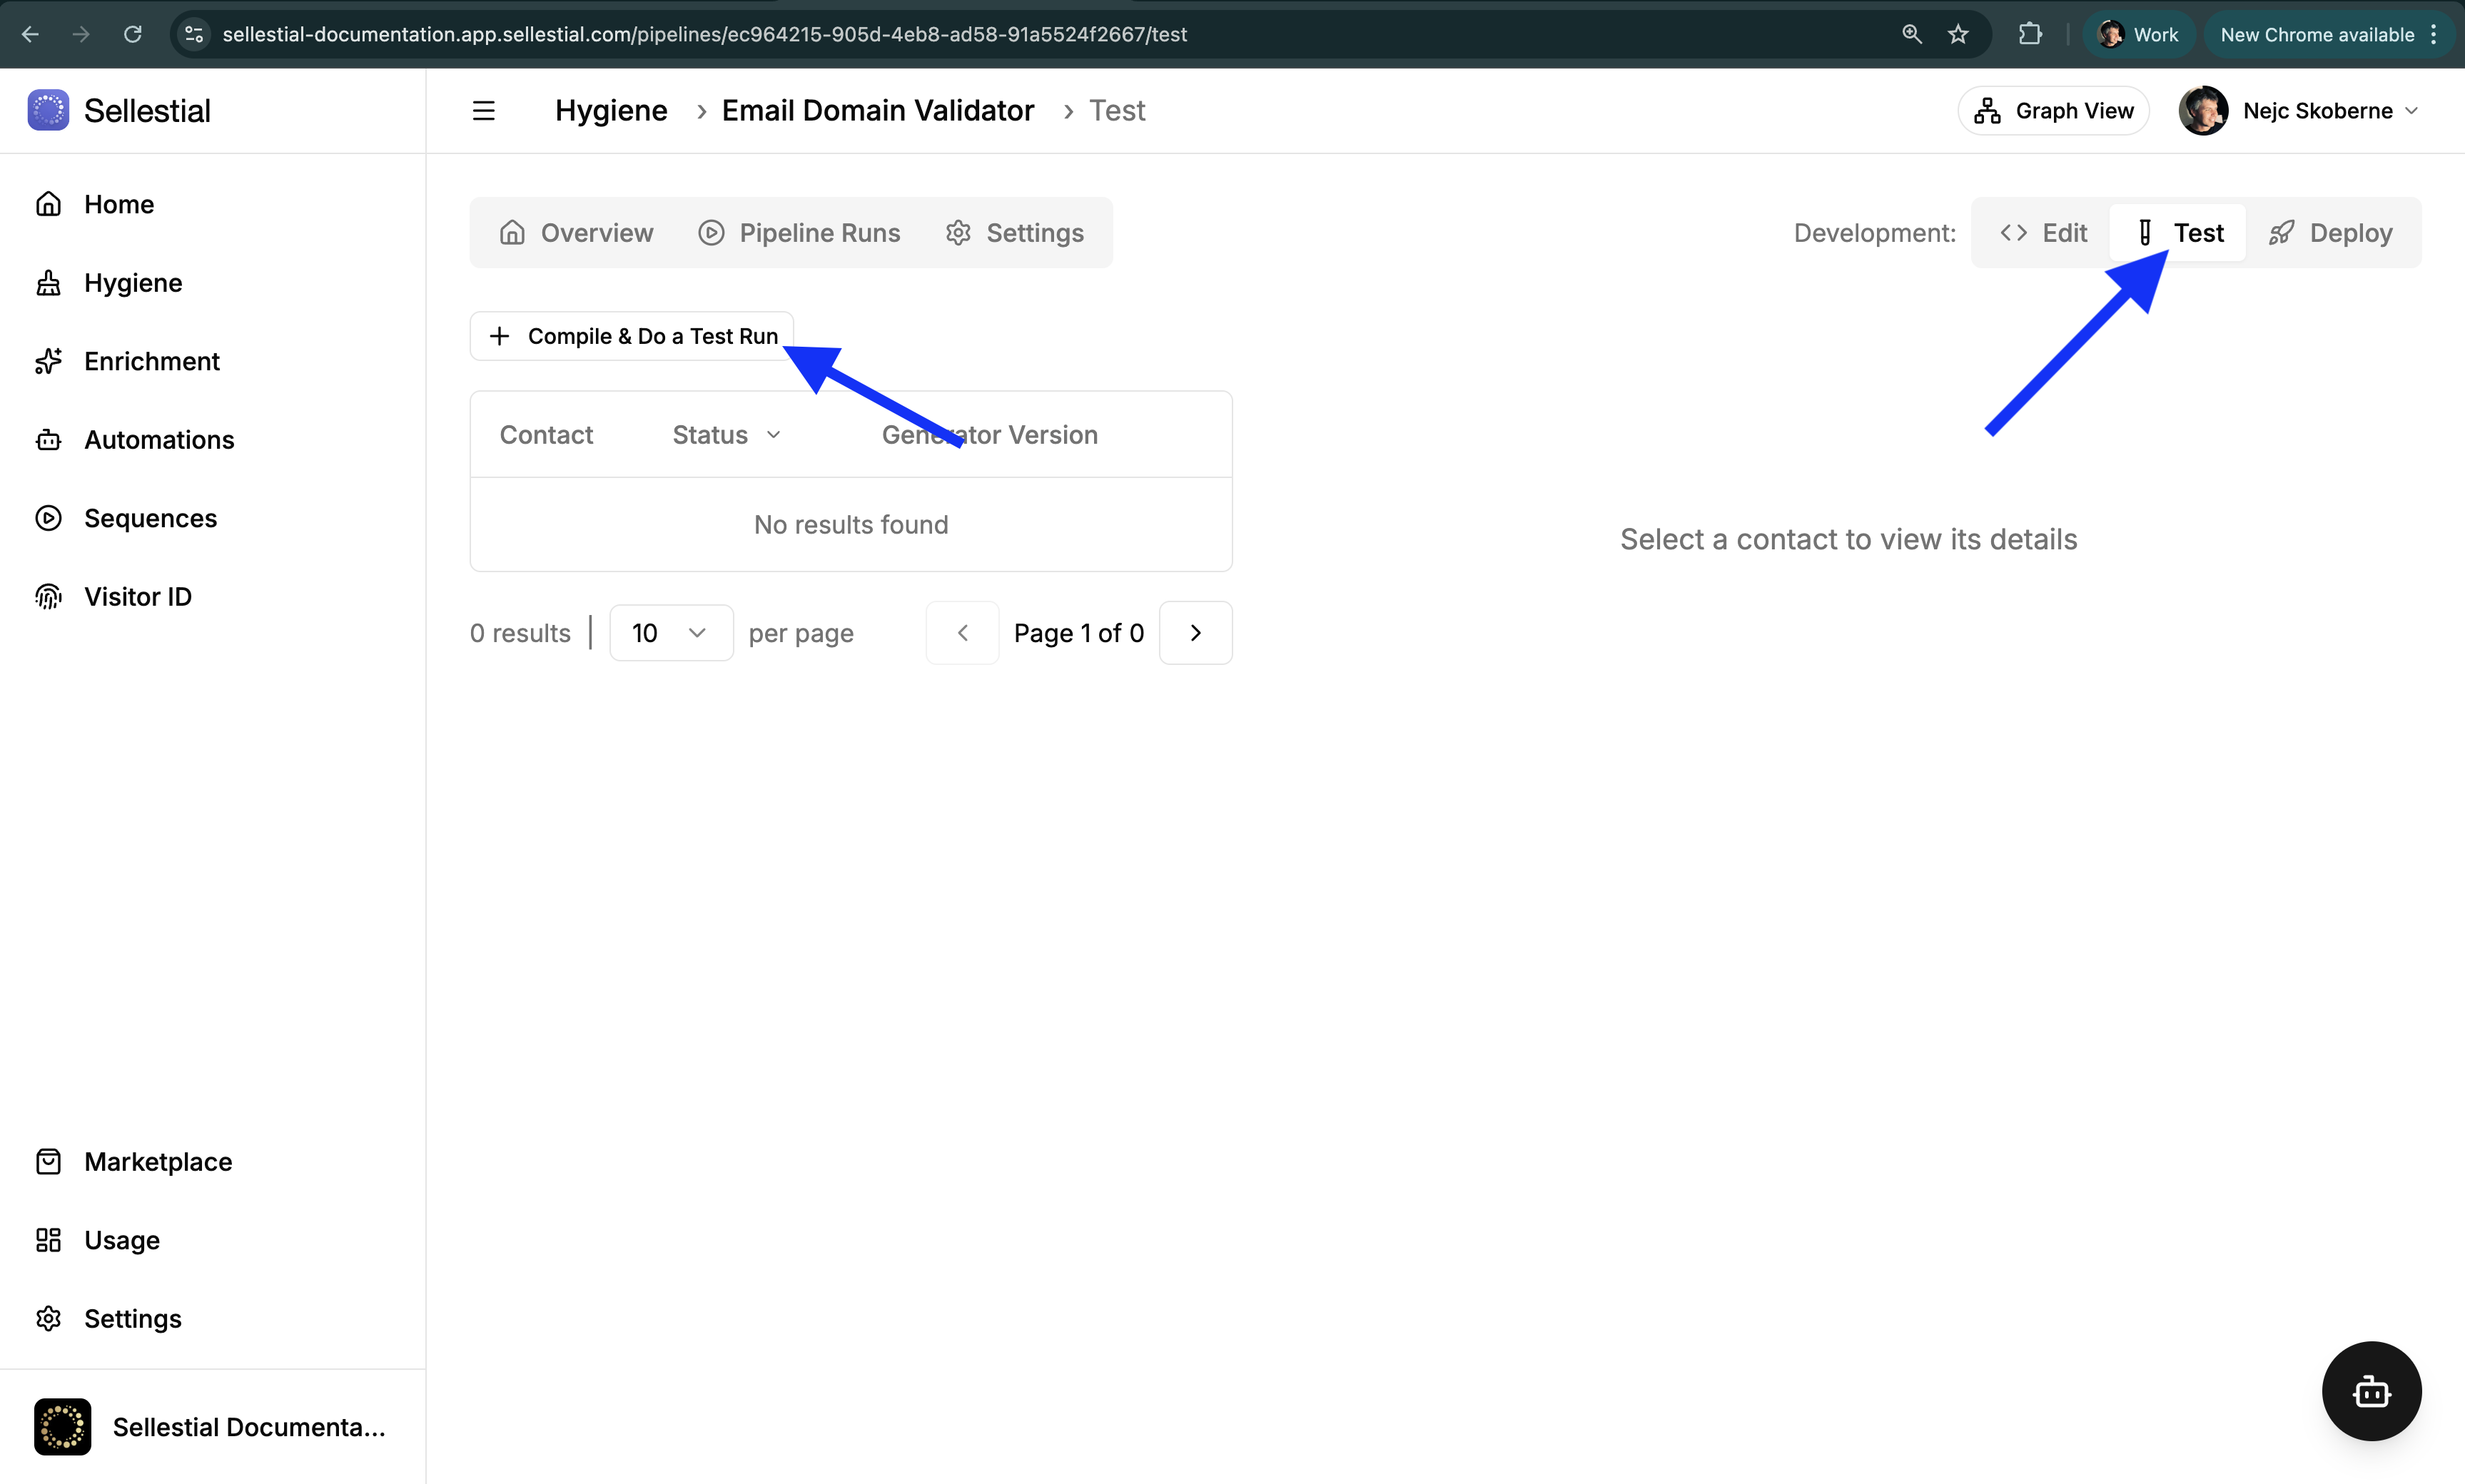
Search for and select a test record for the test run.
After the test run is completed, you will see the results in the Result Data section.
-
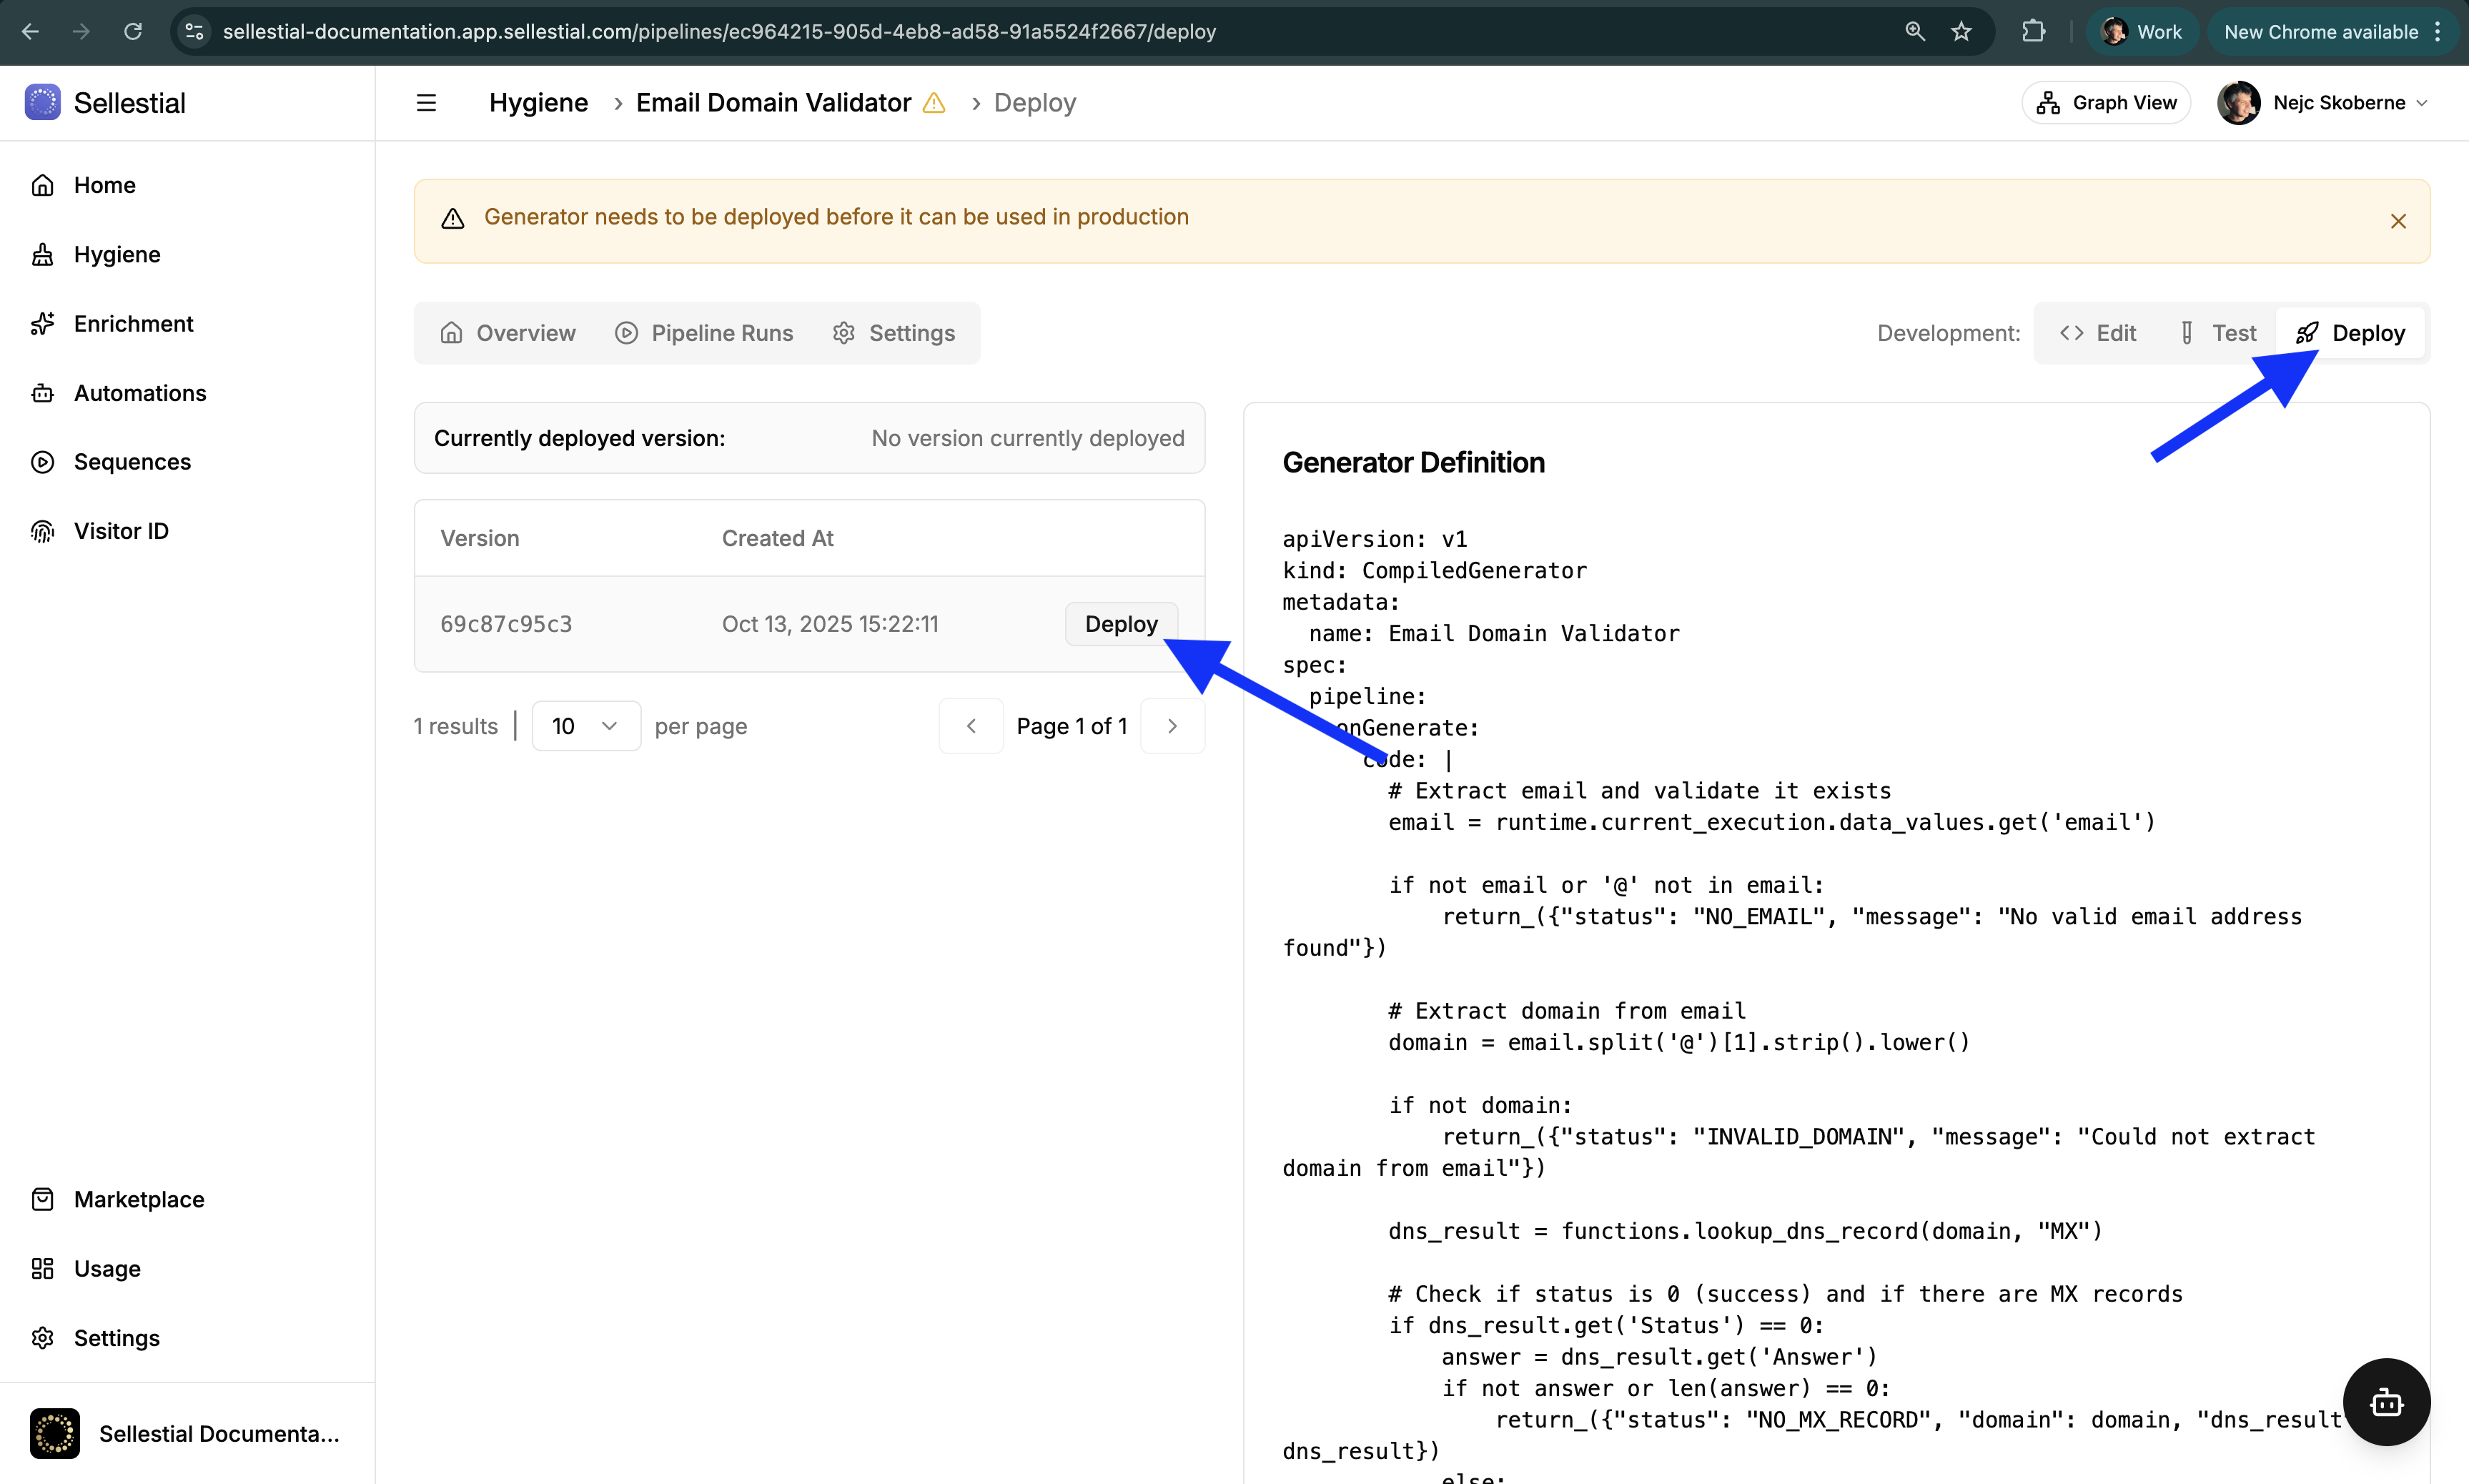
Deploy Pipeline
After you are satisfied with the test results, you can deploy the pipeline to enable mass processing by navigating to the Deploy tab and clicking the Deploy button.
-
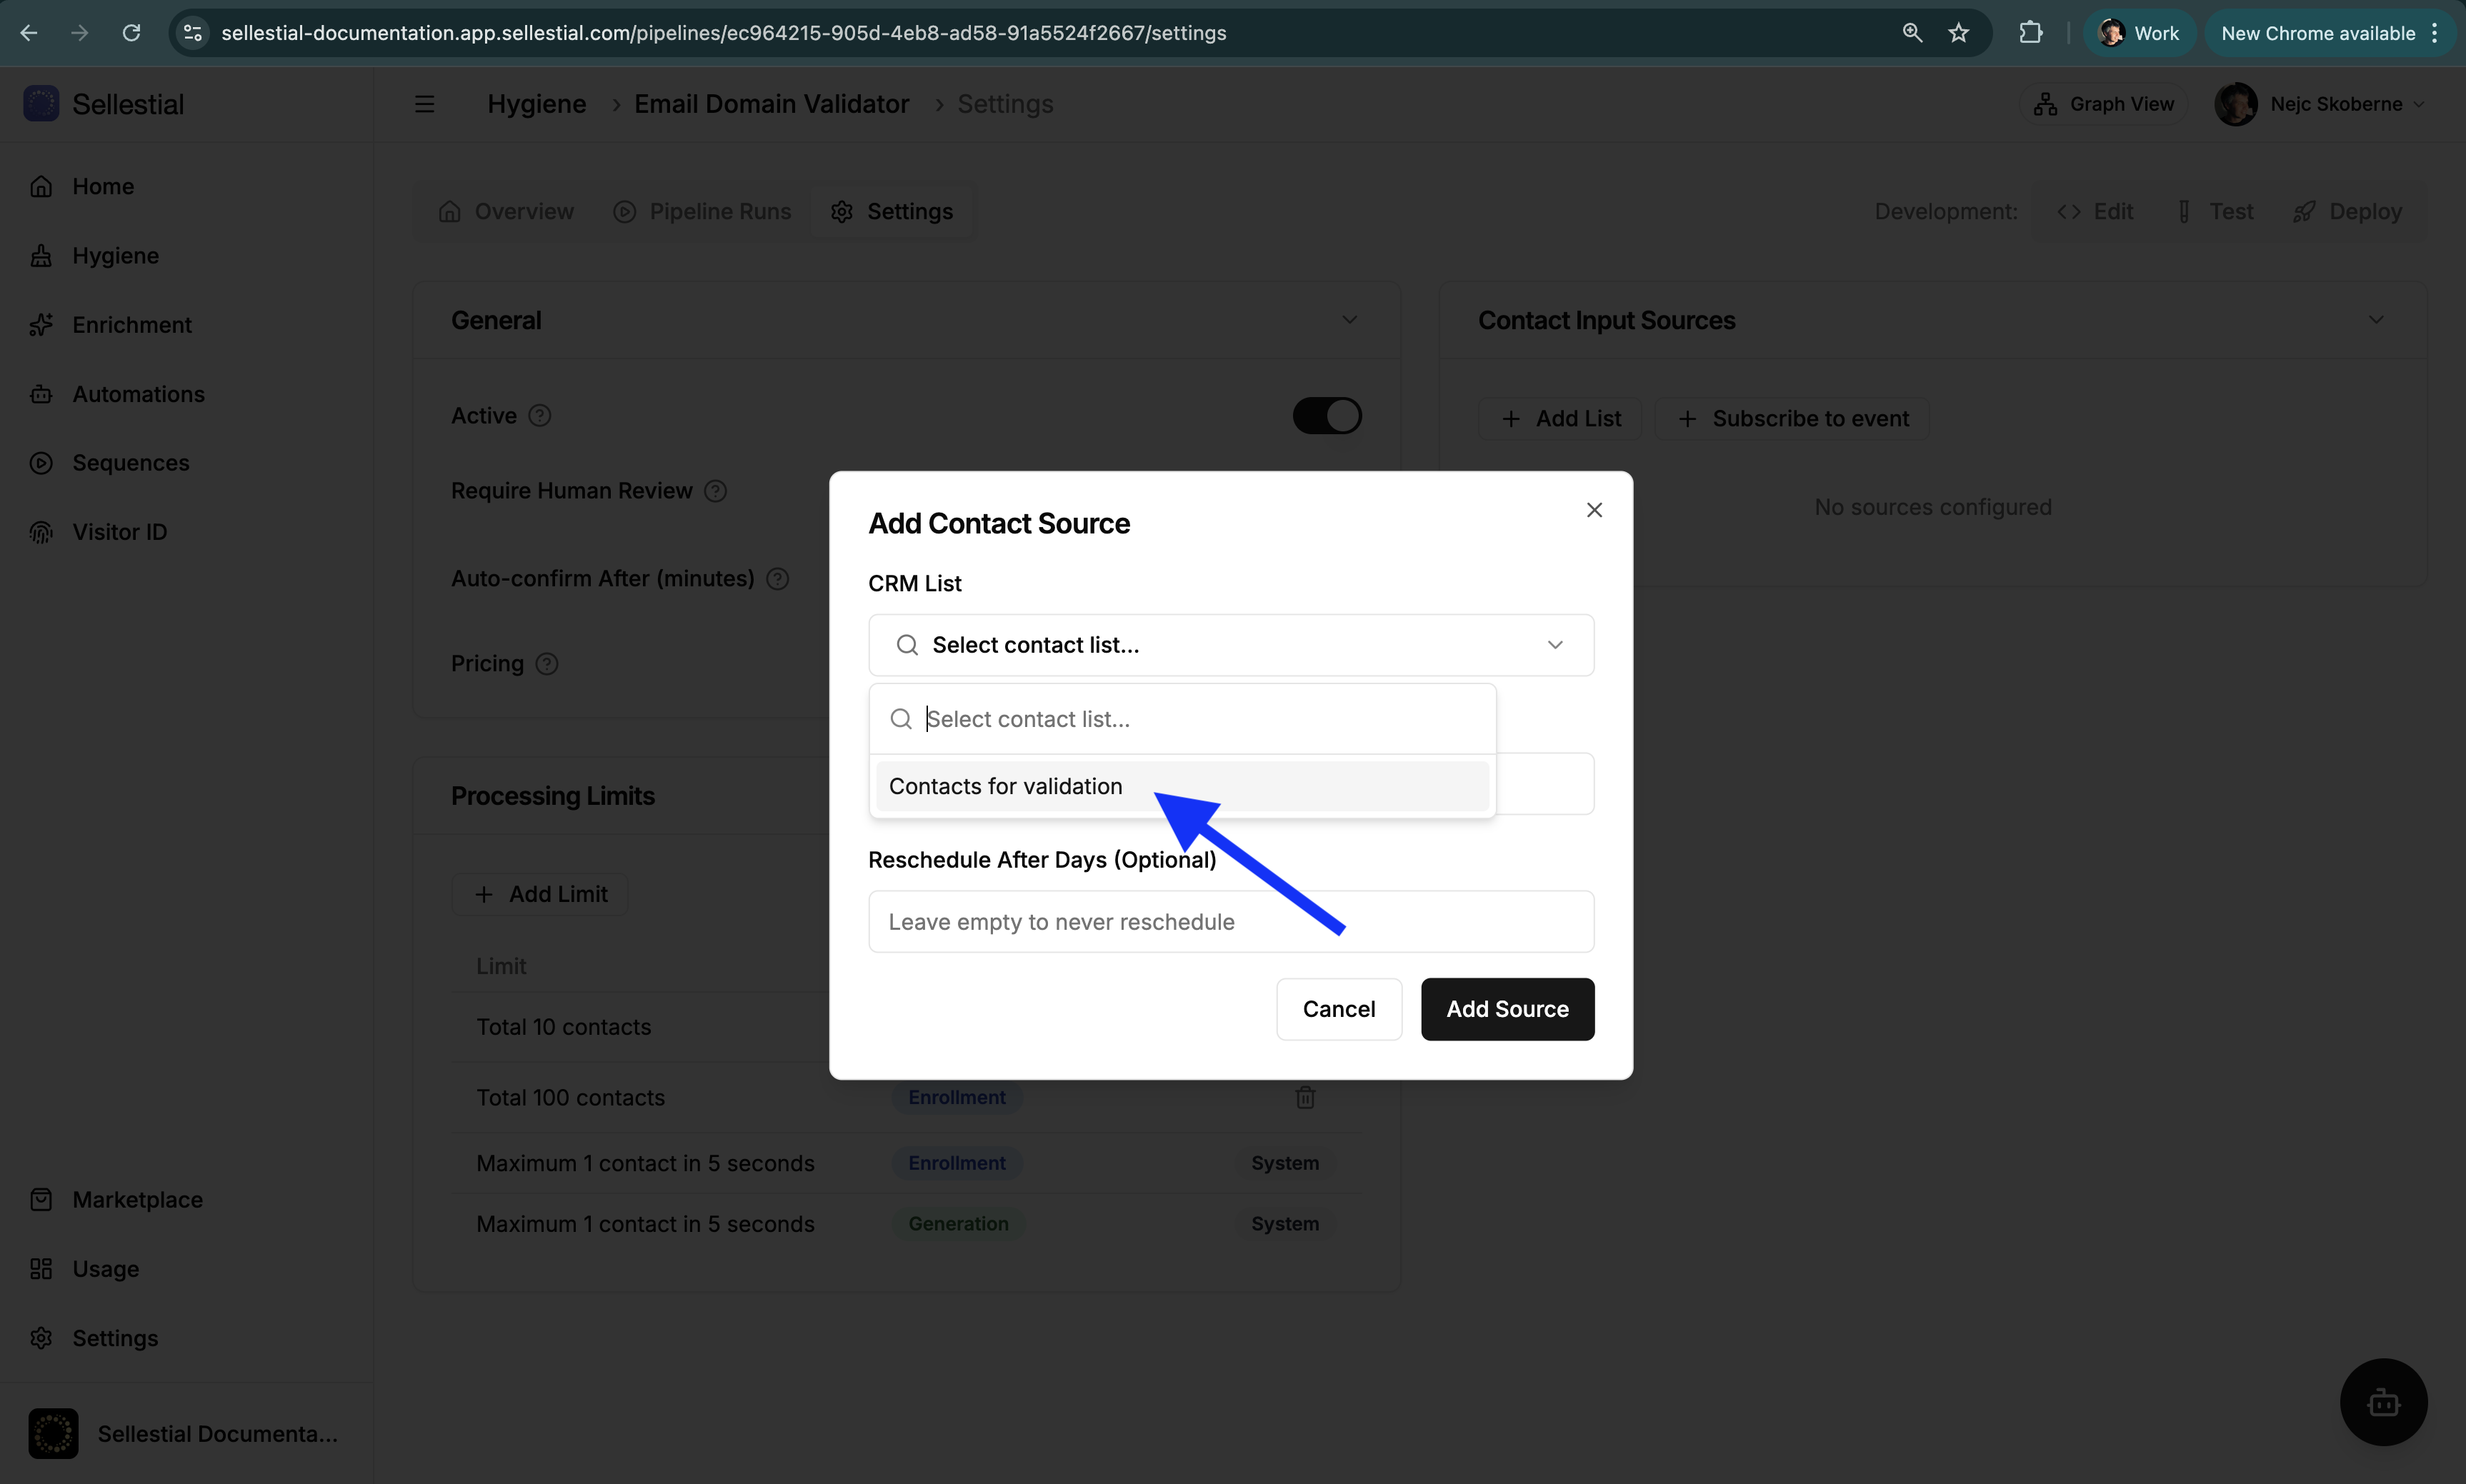
Add Input Source
In the pipeline’s Settings tab:
- Click + Add List under “Contact Input Sources”
- Select a contact list from HubSpot
- Modify processing limits if desired (by default, there are two limits configured - a limit of 10 contacts and a limit of 100 contacts - these need to be removed to process more)
-
Activate Pipeline
After the pipeline is deployed, it needs to be activated to start processing records from the input source(s). In the pipeline’s Settings tab, click the Activate toggle to activate the pipeline.
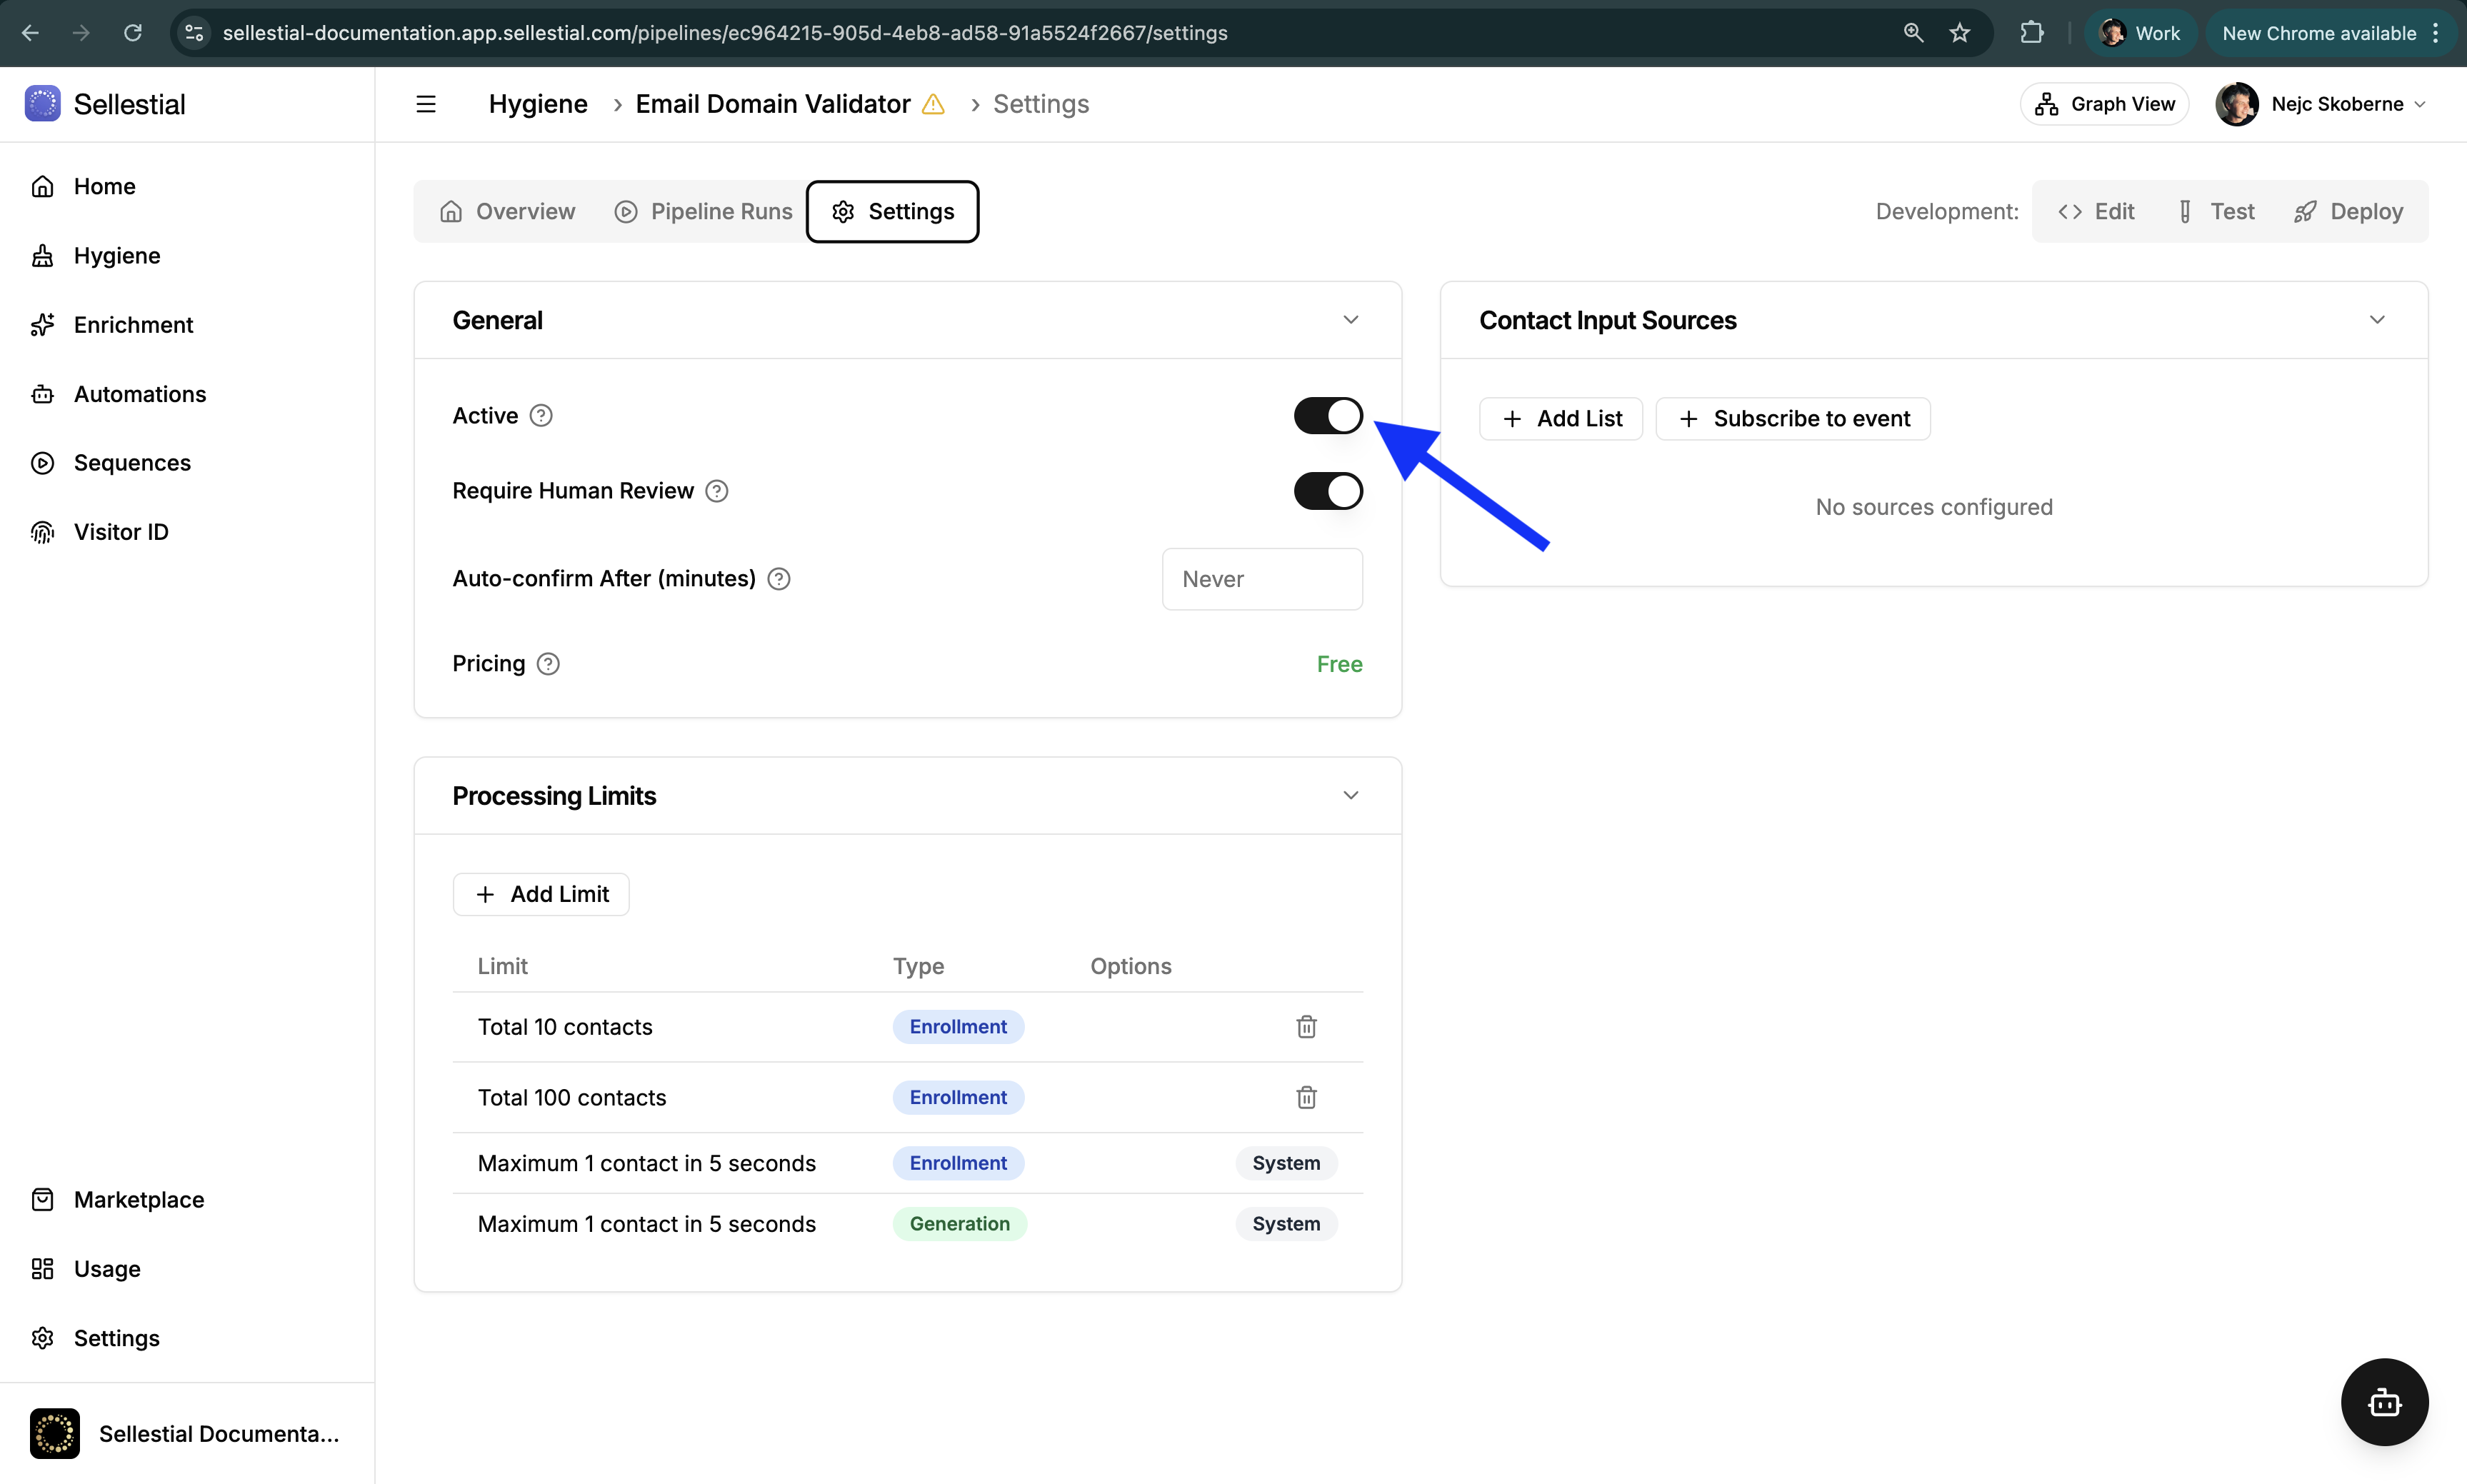 Best practiceBy default, Require Human Review is enabled. This means that any output generated by the pipeline will need to be reviewed by a human before it is saved (“pushed”) to the CRM. This is a good practice during the testing phase to ensure that the pipeline is working as expected and that the output is accurate.
 -
Confirm & Push Results
Navigate to the Pipeline Runs tab to see:
- Processing status for each contact
- Enriched data panel showing validation results
- Execution logs with detailed processing steps
Click the Confirm button to push the results to the CRM.
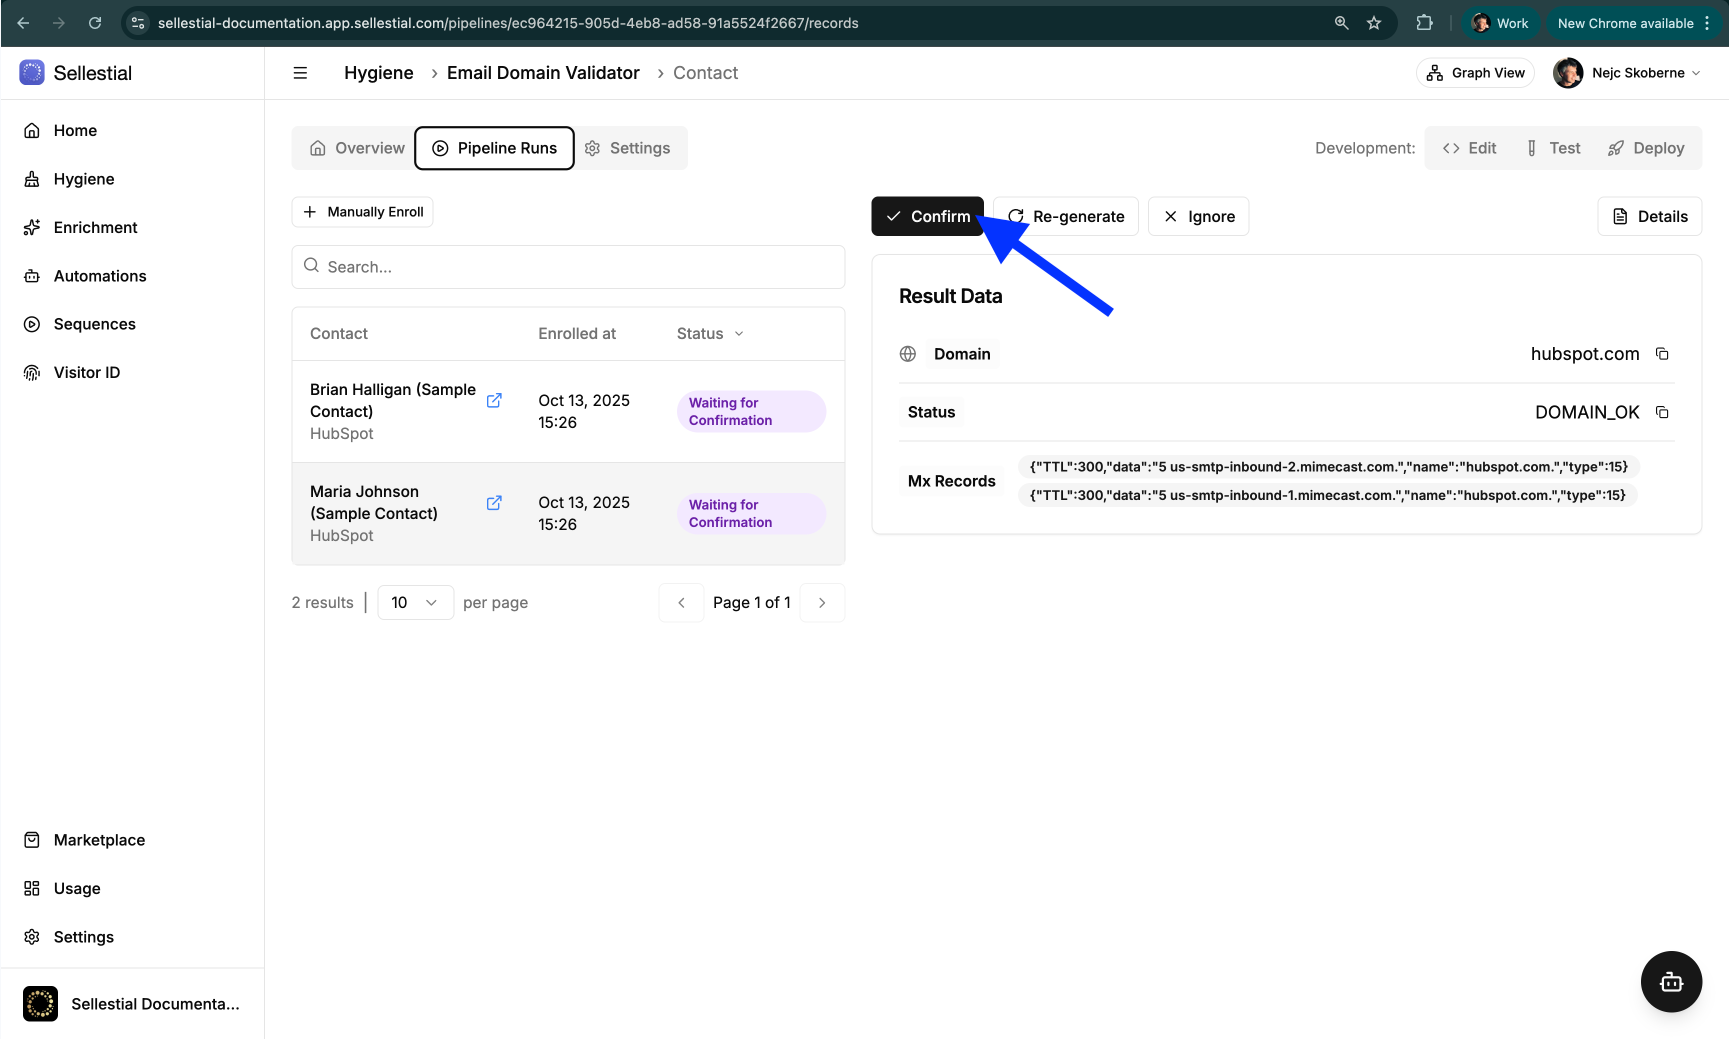
Once the results are confirmed, they will be pushed to the CRM. You can turn off manual confirmation in the Settings tab once you are confident in the results, to fully automate the pipeline.